Search result
Speaker installation
Determine the speaker system depending on the number of speakers you are using and install each speaker and subwoofer in the room.
Speaker installation is explained using this example of a typical installation.
|
FL/FR |
Place the FRONT left and right speakers an equal distance from the main listening position. The distance between each speaker and your TV should also be the same. |
|
C |
Place the CENTER speaker in between the front speakers and above or below your TV. |
|
SL/SR |
Place the SURROUND left and right speakers an equal distance to the left and right sides of the main listening position. If you don’t have surround back speakers, move the surround speakers slightly behind your listening position. |
|
SBL/SBR |
Place the SURROUND BACK left and right speakers an equal distance from the main listening position and directly behind the main listening position. When using a single surround back speaker (SB), place it directly behind the listening position. |
|
SW 1/2/3/4 |
Place your subwoofer near your front speakers. If you are using multiple subwoofers, place pairs of subwoofers spaced equally across the front or rear walls of the room or place single subs midway between the front pairs or rear pairs. |
|
FHL/FHR |
Place the FRONT HEIGHT left and right speakers directly above the front speakers. Mount them as close to the ceiling as possible and aim them towards the main listening position. |
|
TFL/TFR |
Mount the TOP FRONT left and right speakers on the ceiling slightly in front of your main listening position and aligned with the left and right front speakers. |
|
TML/TMR |
Mount the TOP MIDDLE left and right speakers directly above the main listening position and aligned with the left and right front speakers. |
|
TRL/TRR |
Mount the TOP REAR left and right speakers on the ceiling slightly behind your main listening position and aligned with the left and right front speakers. |
|
RHL/RHR |
Place the REAR HEIGHT left and right speakers directly behind the main listening position. Mount them as close to the ceiling as possible and aligned with the left and right front speakers. |
|
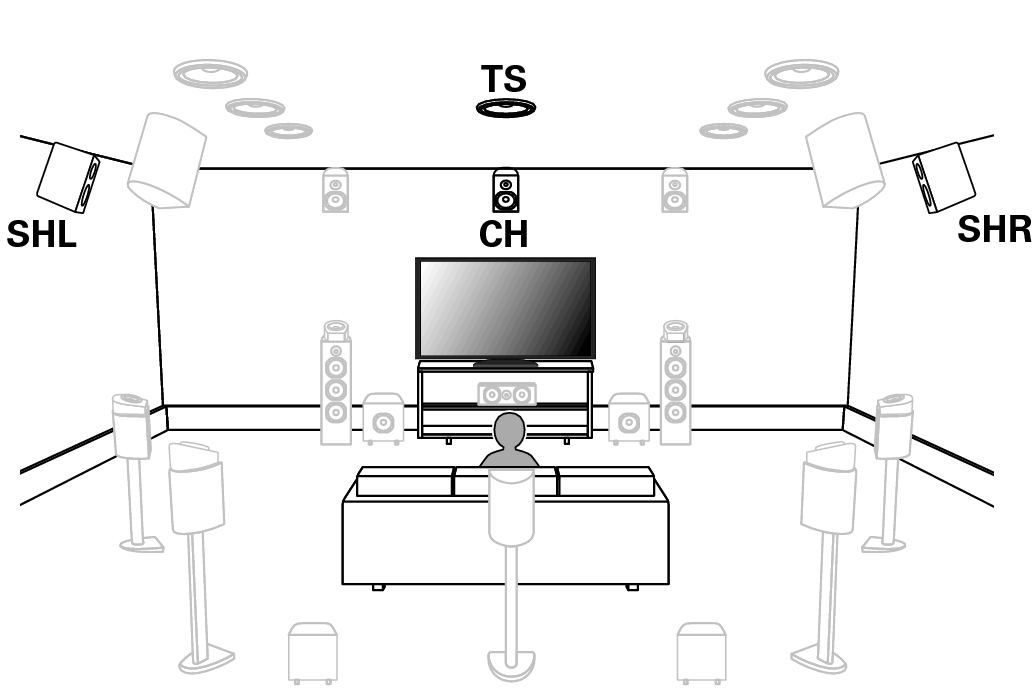
SHL/SHR |
Place the SURROUND HEIGHT left and right speakers directly above the surround speakers. |
|
CH |
Place the CENTER HEIGHT speaker directly above the center speaker. Mount them as close to the ceiling as possible and aim them towards the main listening position. |
|
TS |
Place the TOP SURROUND speaker directly above the main listening position and aligned with the center channel speaker. |
|
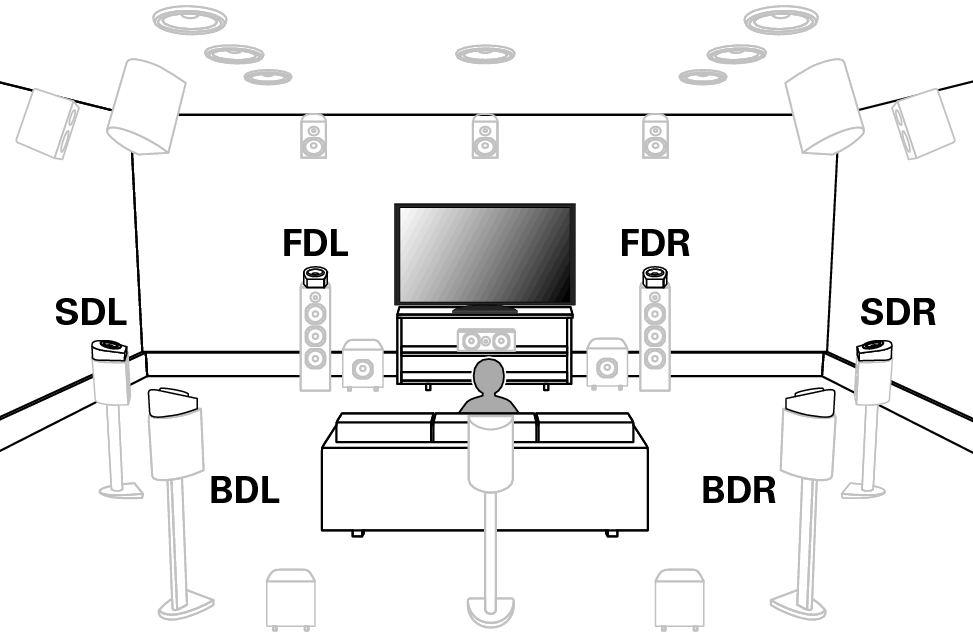
FDL/FDR |
Place the FRONT Dolby Atmos Enabled speaker on the front speaker. For a Dolby Atmos Enabled integrated with a front speaker, place the Dolby Atmos Enabled speaker instead of the front speaker. |
|
SDL/SDR |
Place the SURROUND Dolby Atmos Enabled speaker on the surround speaker. For a Dolby Atmos Enabled speaker integrated with a surround speaker, place the Dolby Atmos Enabled speaker instead of the surround speaker. |
|
BDL/BDR |
Place the BACK Dolby Atmos Enabled speaker on the surround back speaker. For a Dolby Atmos Enabled speaker integrated with a surround back speaker, place the Dolby Atmos Enabled speaker instead of the surround back speaker. |
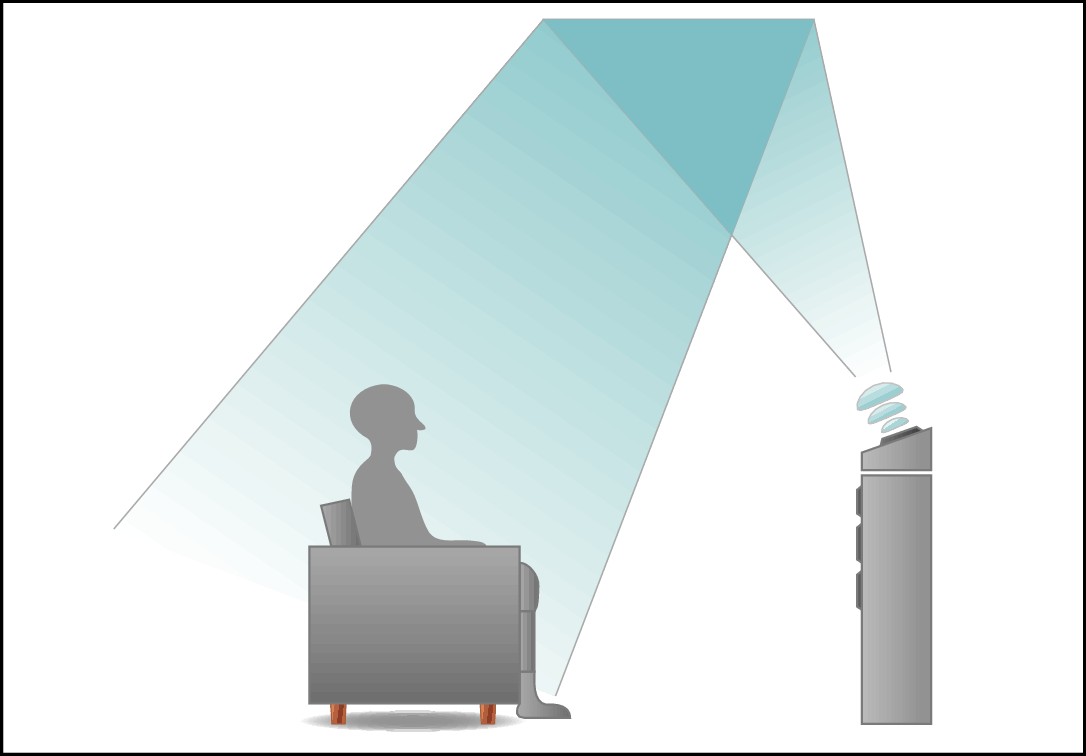
About Dolby Atmos Enabled speakers
Dolby Atmos Enabled speakers reflect the sound off the ceiling to allow the sound to come from over your head by using a special upward-pointing speaker that is placed on the floor.
You can enjoy the Dolby Atmos 3D sound even in an environment where speakers cannot be installed on the ceiling.
This unit is compatible with Dolby Atmos and DTS:X which offers an even wider and deeper surround sensation.
The “Speaker Virtualizer” must be set to “On” for Dolby Atmos playback with 5.1-channel speaker configurations or less. link
IMAX DTS:X / DTS:X can be selected regardless of the speaker configuration.
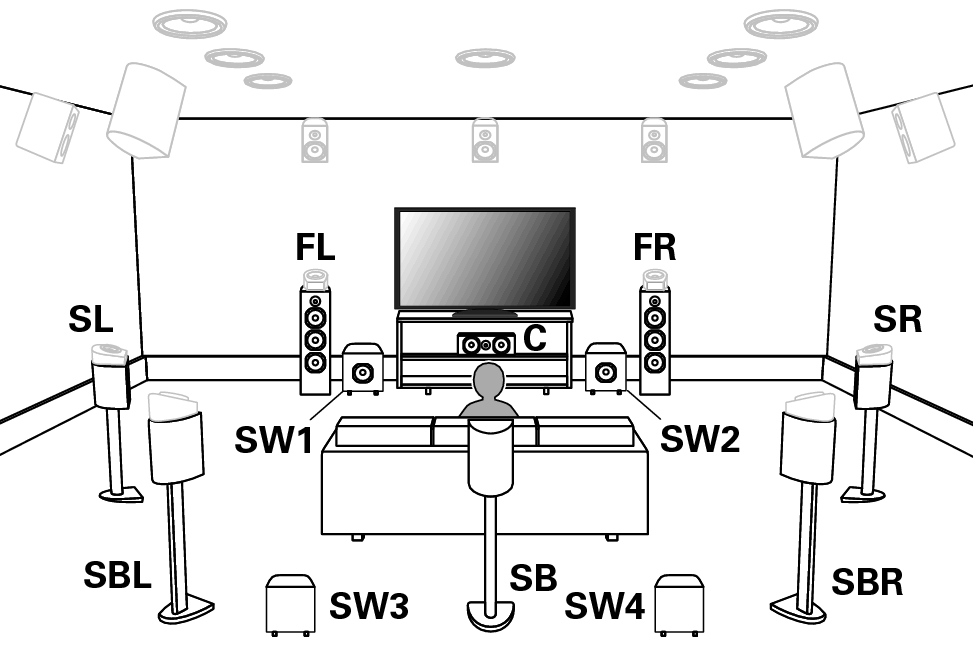
Recommended placement of the speakers
Floor speakers Layout
Use the following illustration as a guide for the installation location of each floor speaker. You do not have to match them exactly.
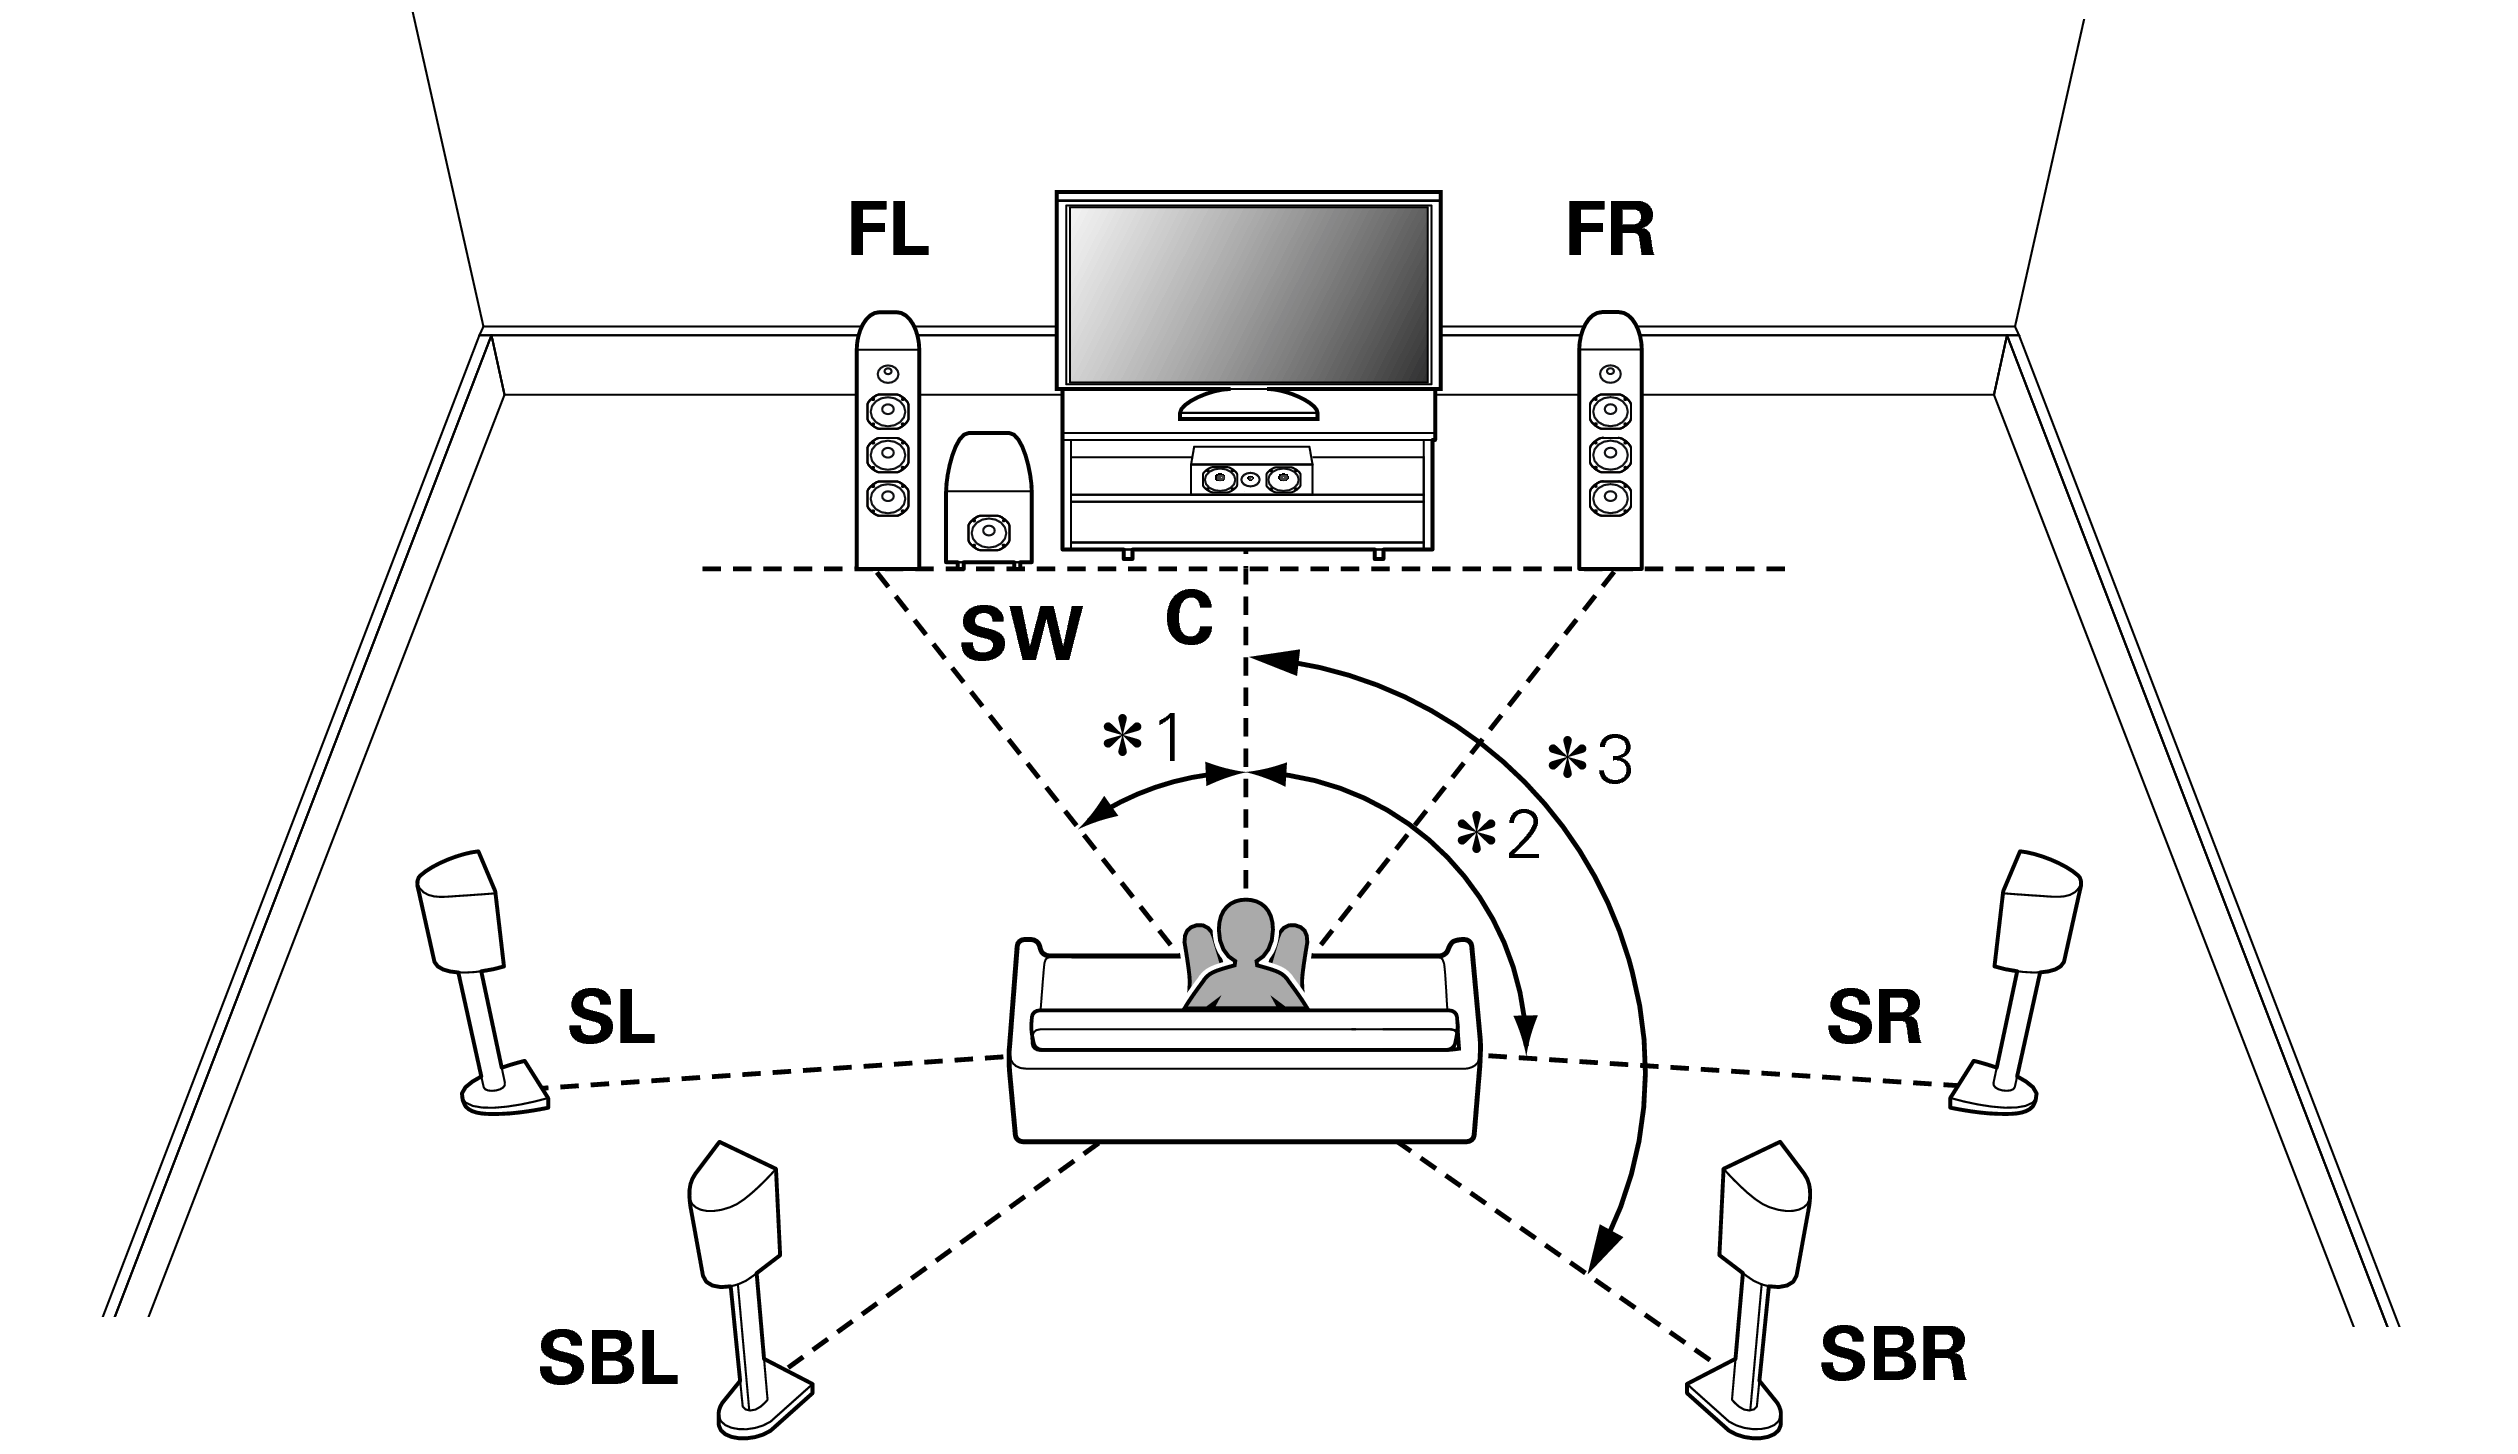
∗1 22° - 30° ∗2 90° - 110° ∗3 135° - 150°
If you are not using the surround back speakers, the recommended angle of the surround sound speakers (∗2) is 120°.
When using a single surround back speaker, place it directly behind the listening position.
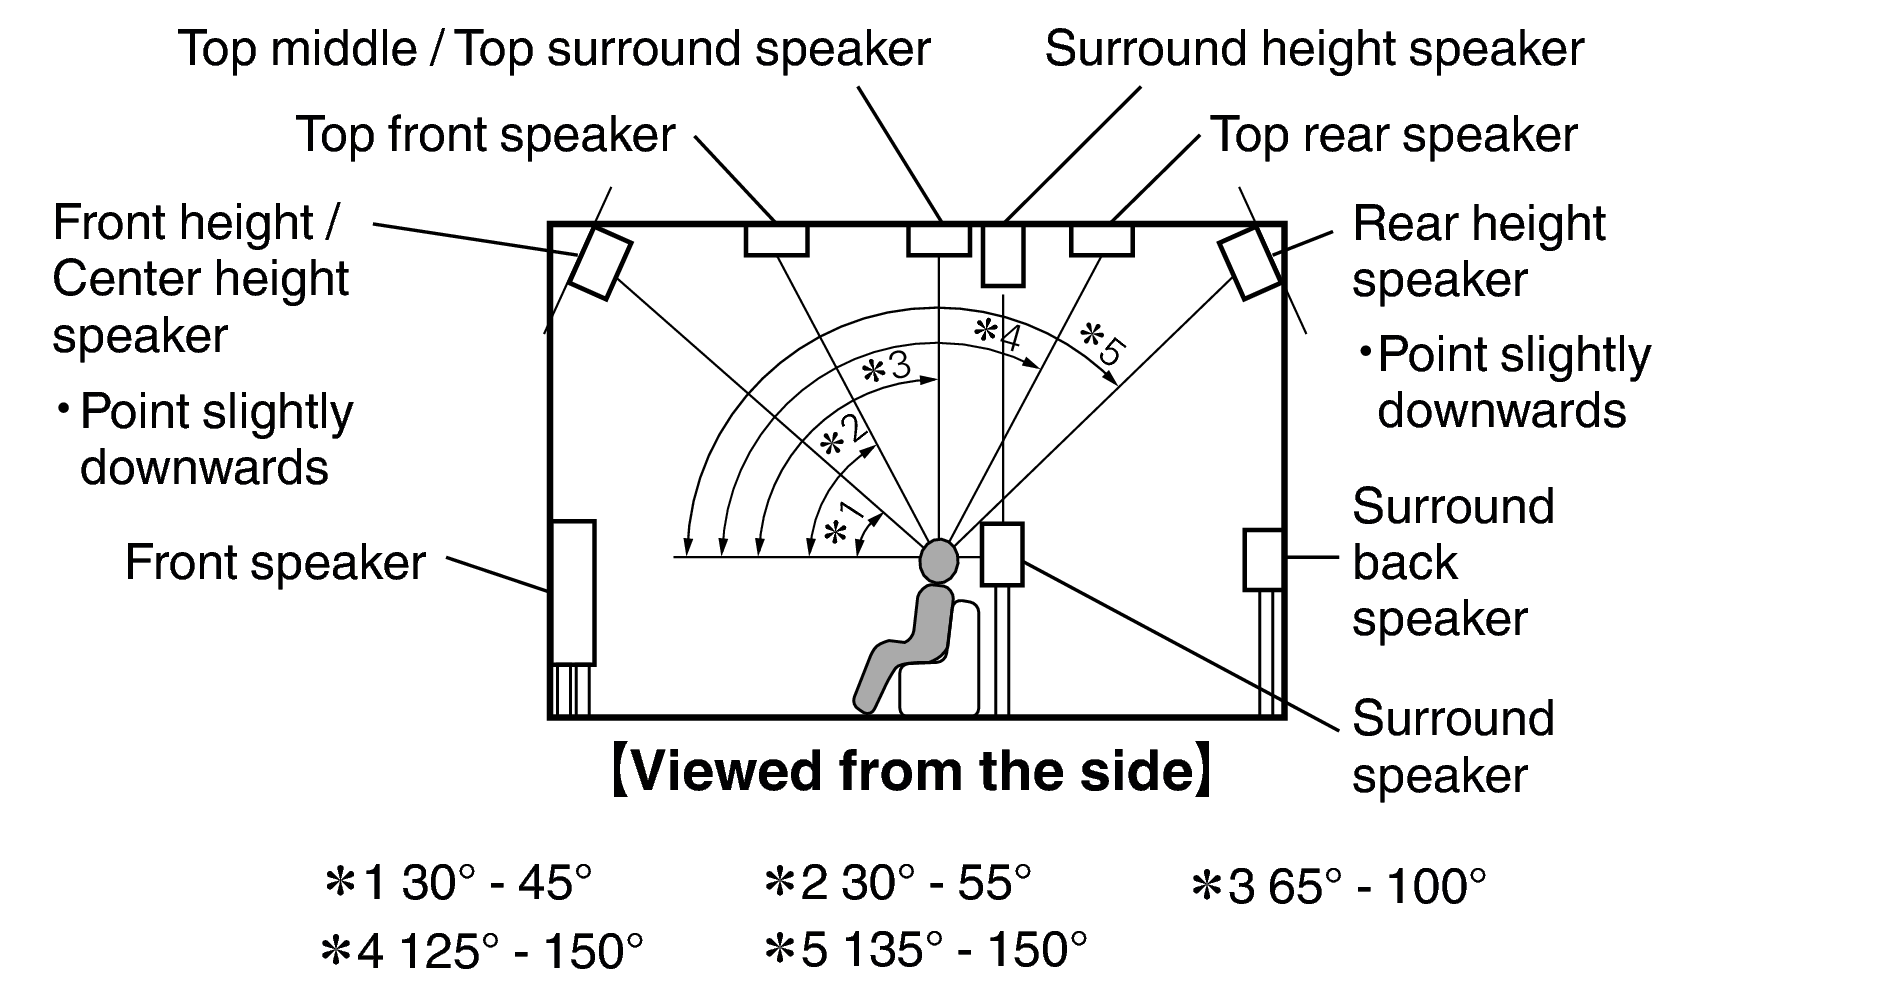
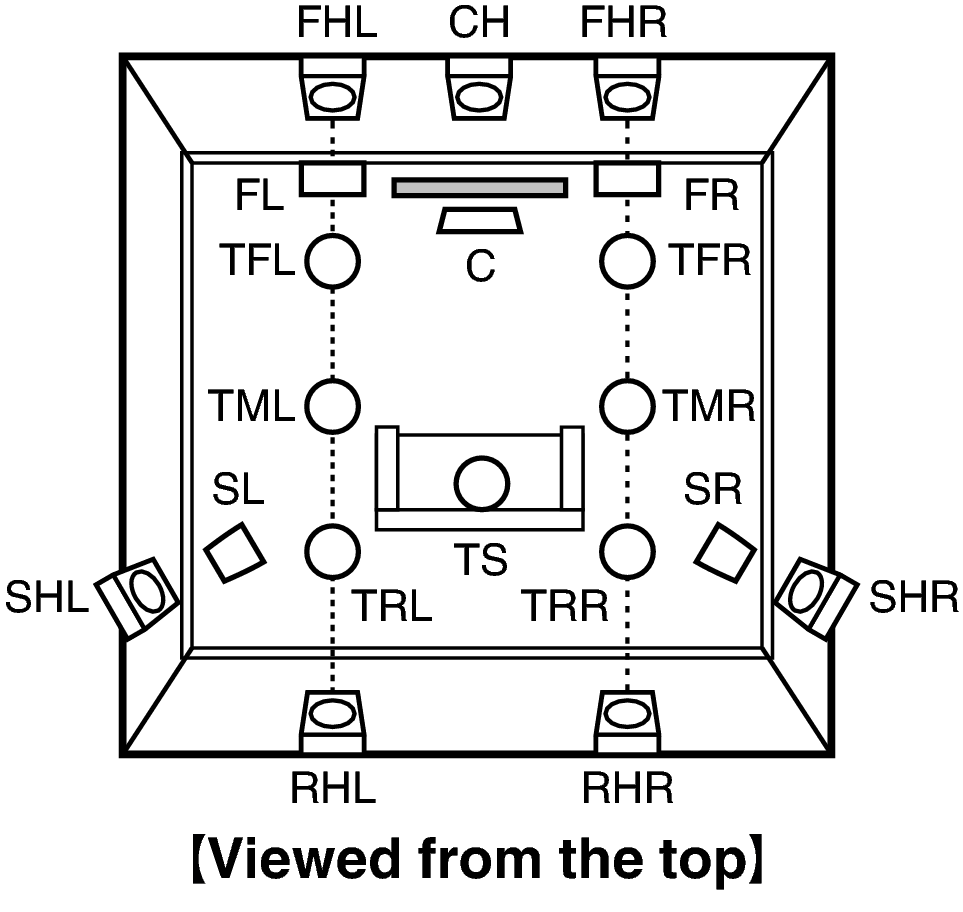
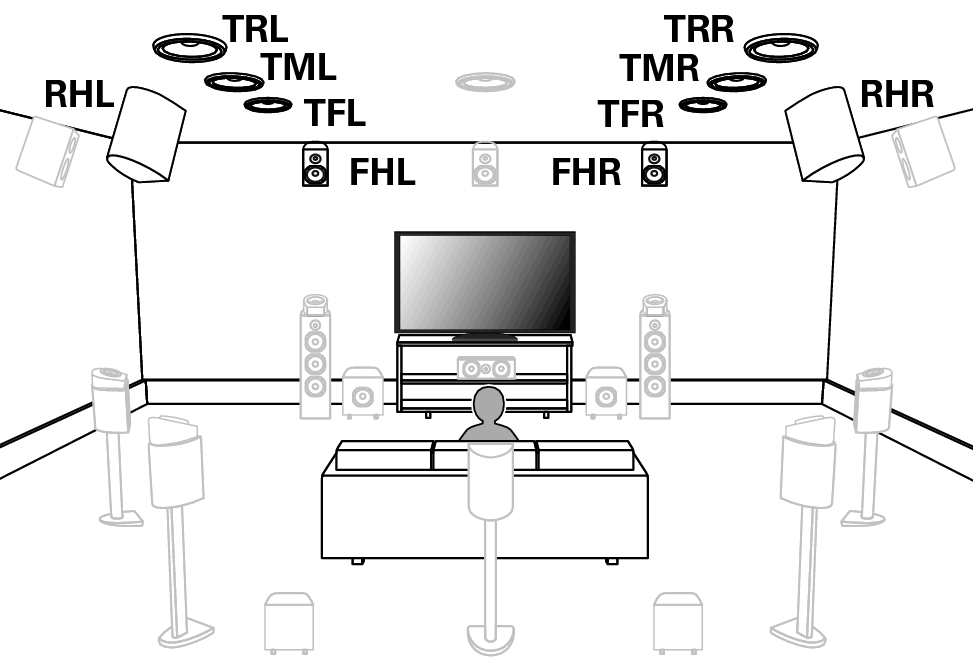
Height speakers Layout
Use the following illustration as a guide for the installation location of each height speaker. You do not have to match them exactly.