Search result
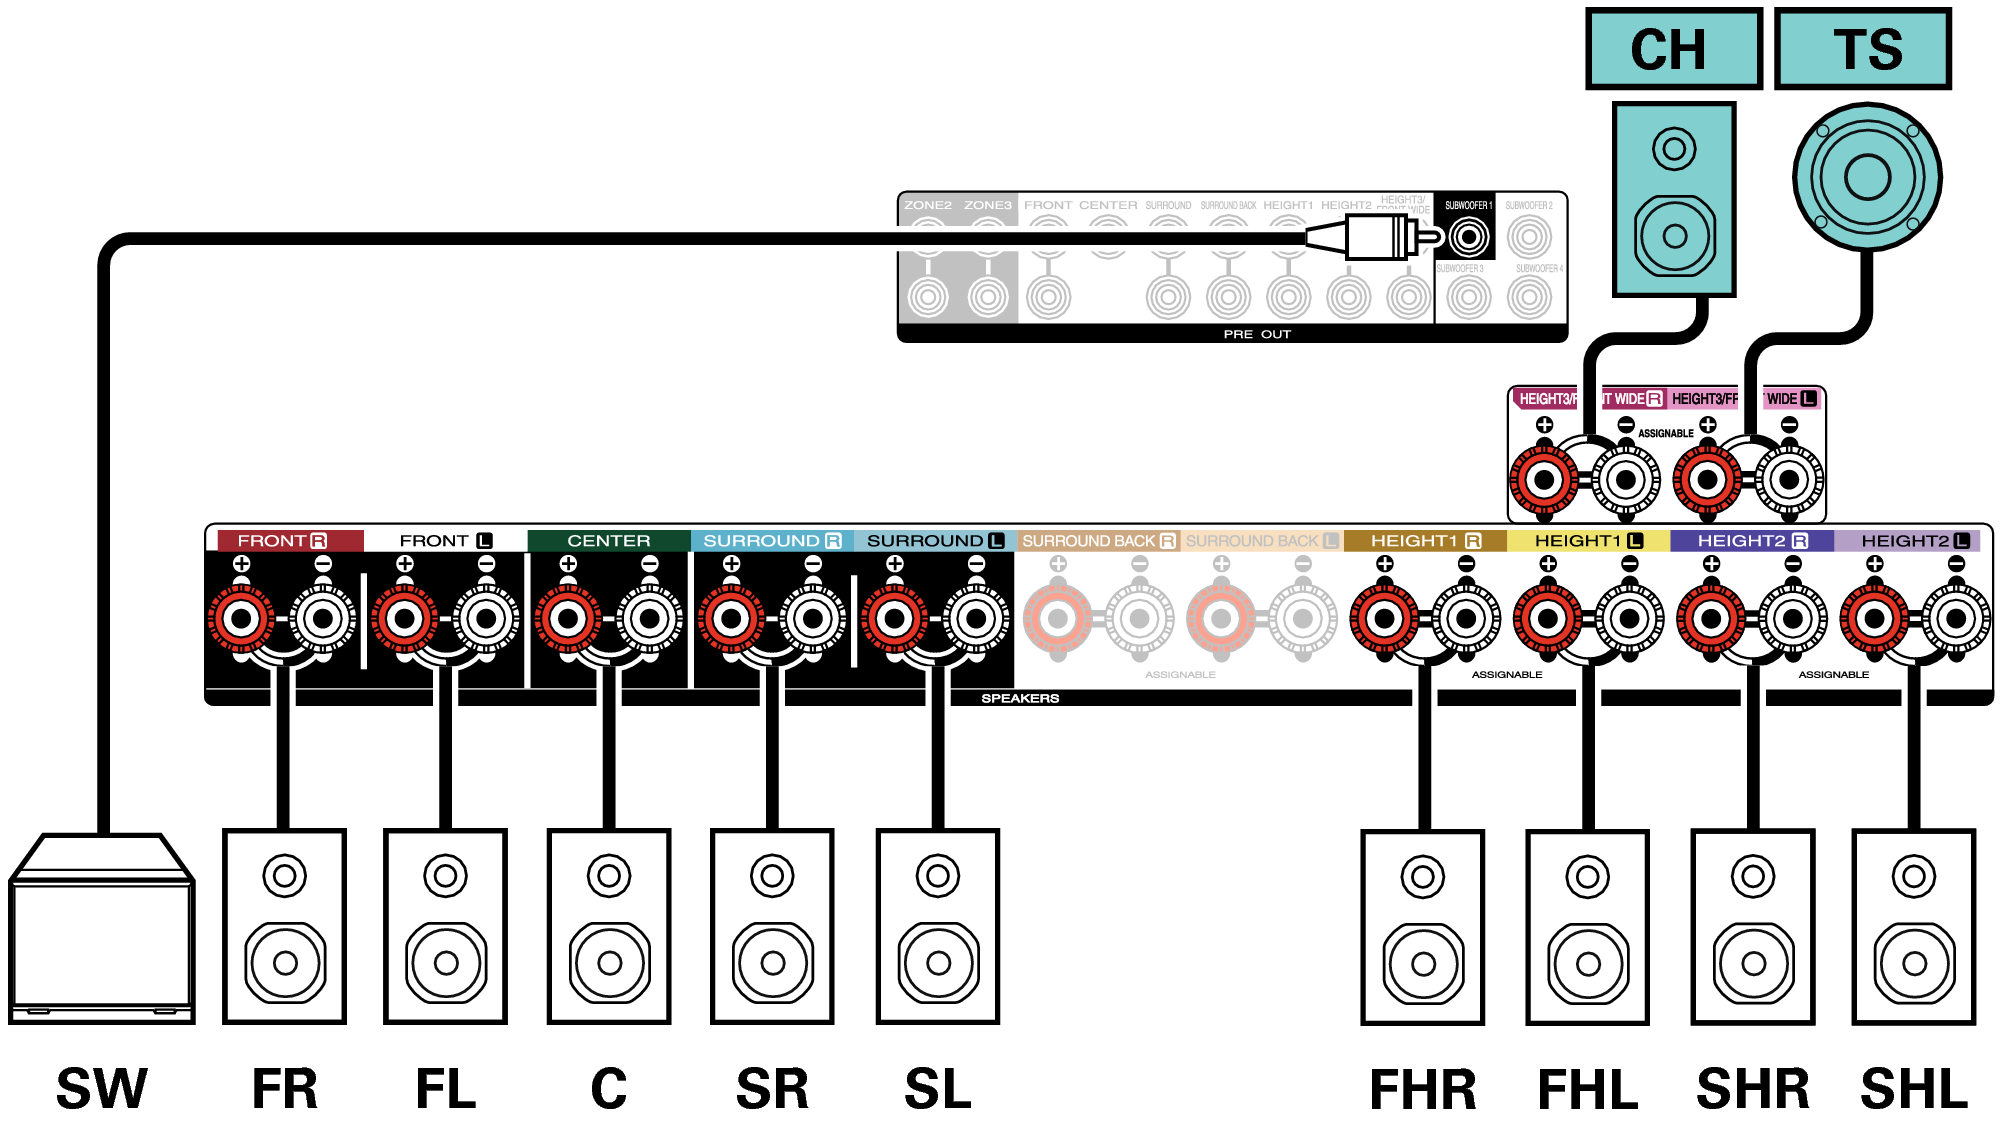
Connecting 11.1-channel speakers
Example layout when using surround back, Front Wide and one set of height speakers
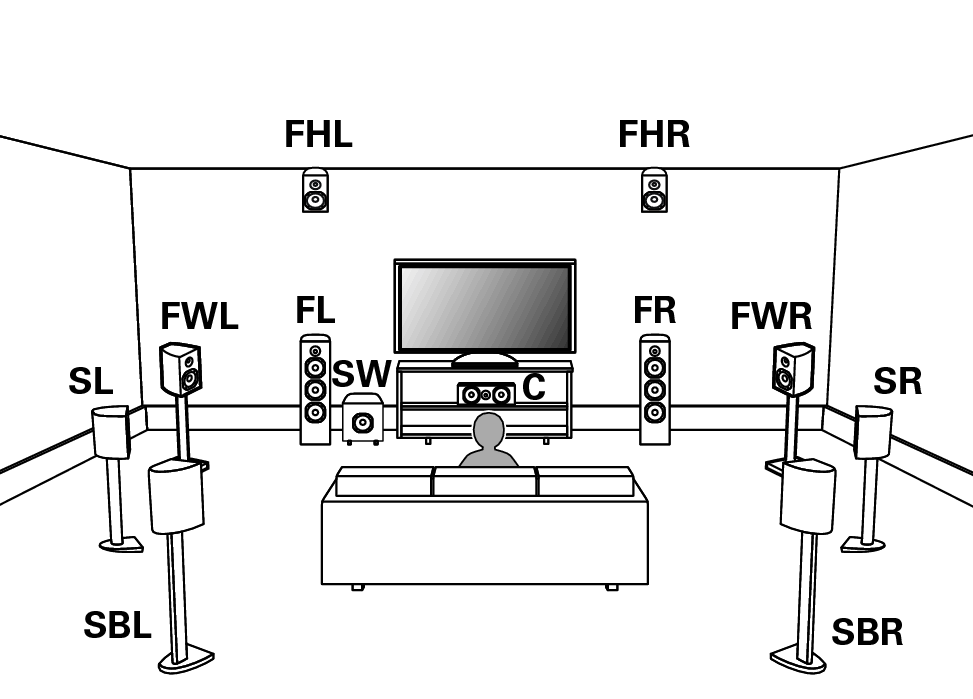
For each speaker connection, refer to the following.
Set Speaker Layout in the menu as follows. link

The front height speakers can be changed to other height, ceiling or Dolby Atmos Enabled speakers in the “Speaker Layout” - “Layout” settings.
Example layout when using surround back and two sets of height speakers
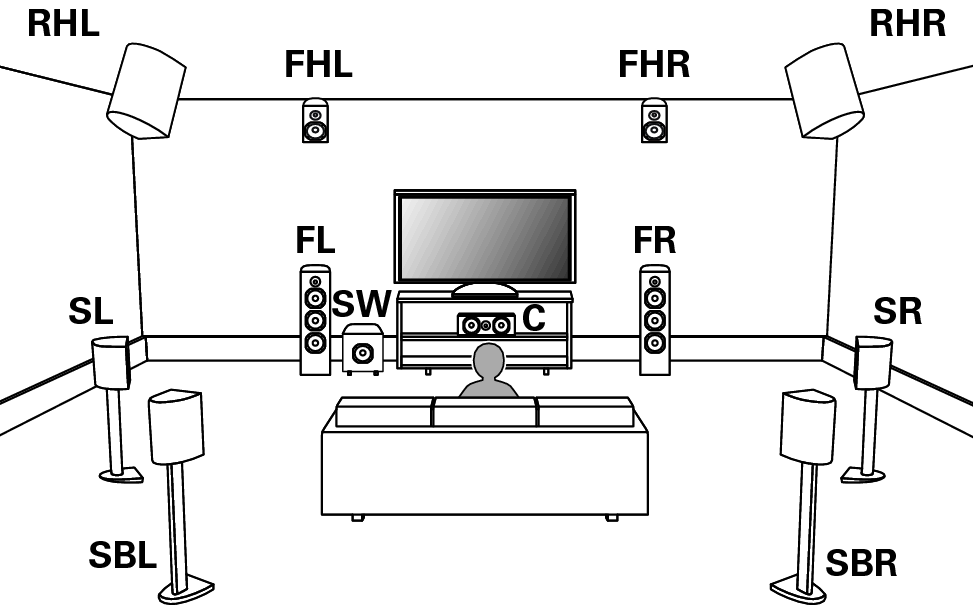
For each speaker connection, refer to the following.
Set Speaker Layout in the menu as follows. link


The front height speakers and rear height speakers can be changed to other height, ceiling or Dolby Atmos Enabled speakers in the “Speaker Layout” - “Layout” settings.
Example layout when using front wide and two sets of height speakers
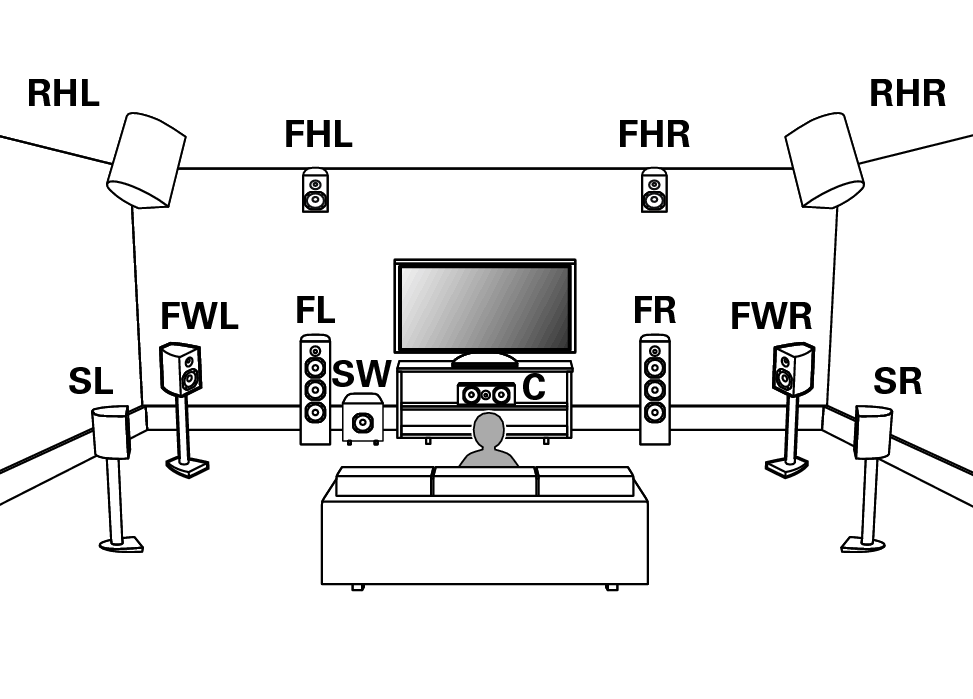
For each speaker connection, refer to the following.
Set Speaker Layout in the menu as follows. link


The front height speakers and rear height speakers can be changed to other height, ceiling or Dolby Atmos Enabled speakers in the “Speaker Layout” - “Layout” settings.
Example layout when using three sets of height speakers
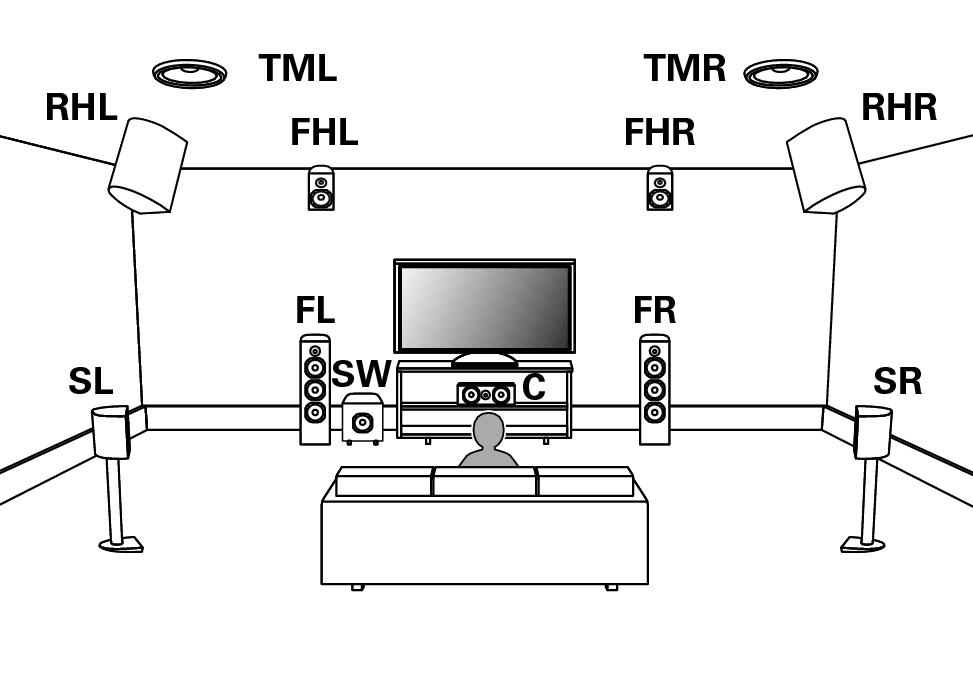
For each speaker connection, refer to the following.
Set Speaker Layout in the menu as follows. link


The front height speakers, top middle speakers and rear height speakers can be changed to other height, ceiling or Dolby Atmos Enabled speakers in the “Speaker Layout” - “Layout” settings.
Example layout for AURO-3D 11.1 channel system
This speaker configuration is optimized for AURO-3D playback.
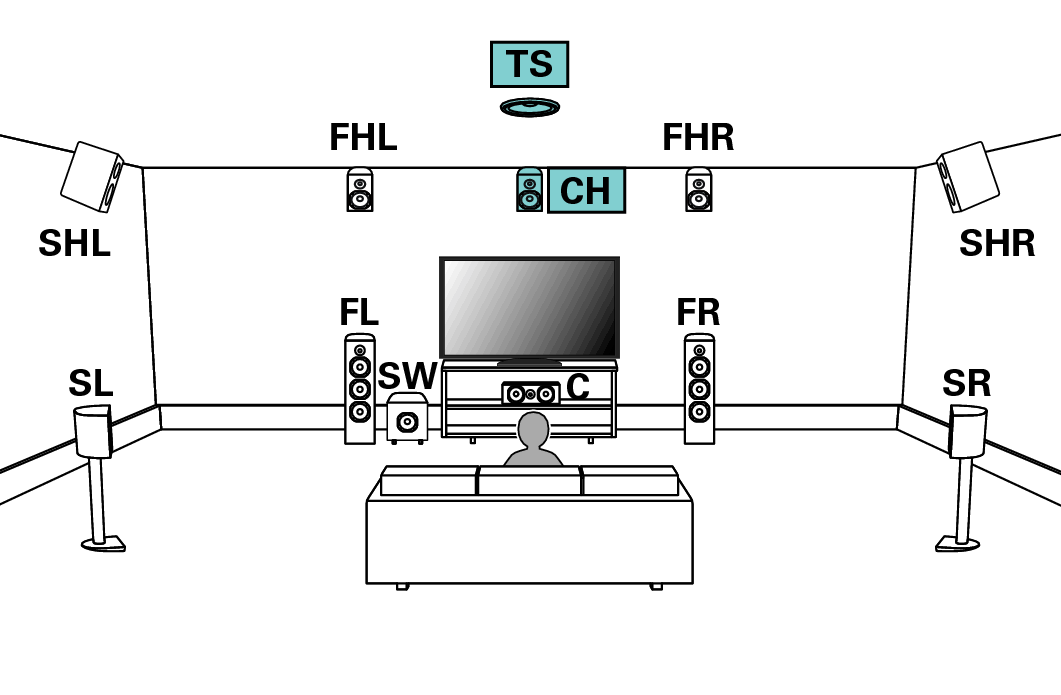
For each speaker connection, refer to the following.
Set Speaker Layout in the menu as follows. link
