Search result
Connecting 11.1-channel speakers
Example layout when using surround back, Front Wide and one set of height speakers
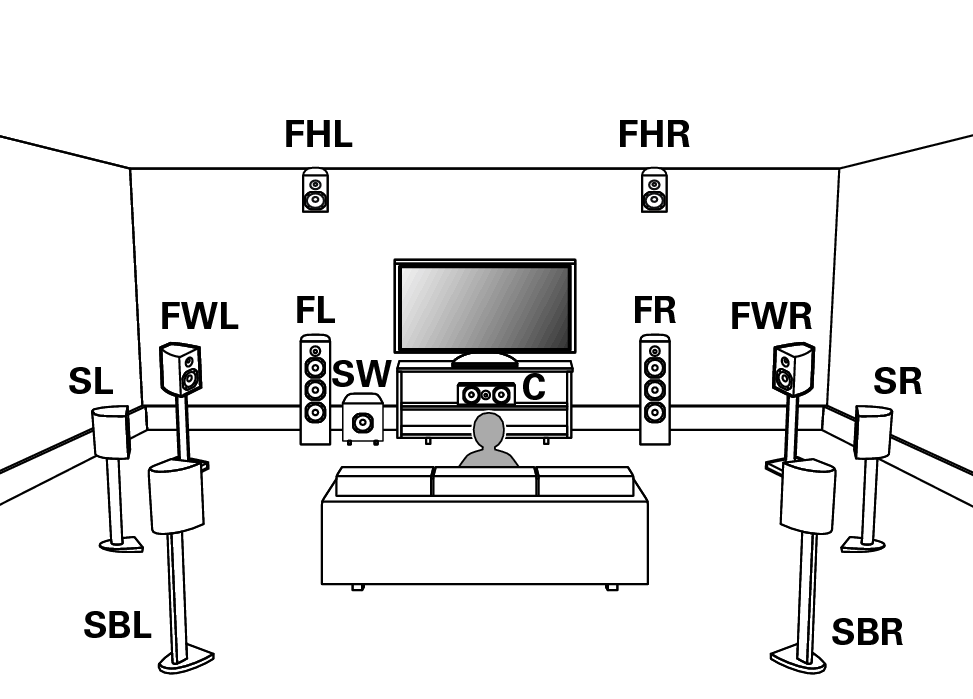
For each speaker connection, refer to Connecting a power amplink.
Set Speaker Layout in the menu as follows. link
Center: Yes
Surround: Yes
Surround Back: 2 spkrs
Front Wide: Yes
Height Speakers: 2 spkrs
Layout: Front Height 
Subwoofers: 1 spkr
The front height speakers can be changed to other height, ceiling or Dolby Atmos Enabled speakers in the “Speaker Layout” - “Layout” settings.
Example layout when using surround back and two sets of height speakers
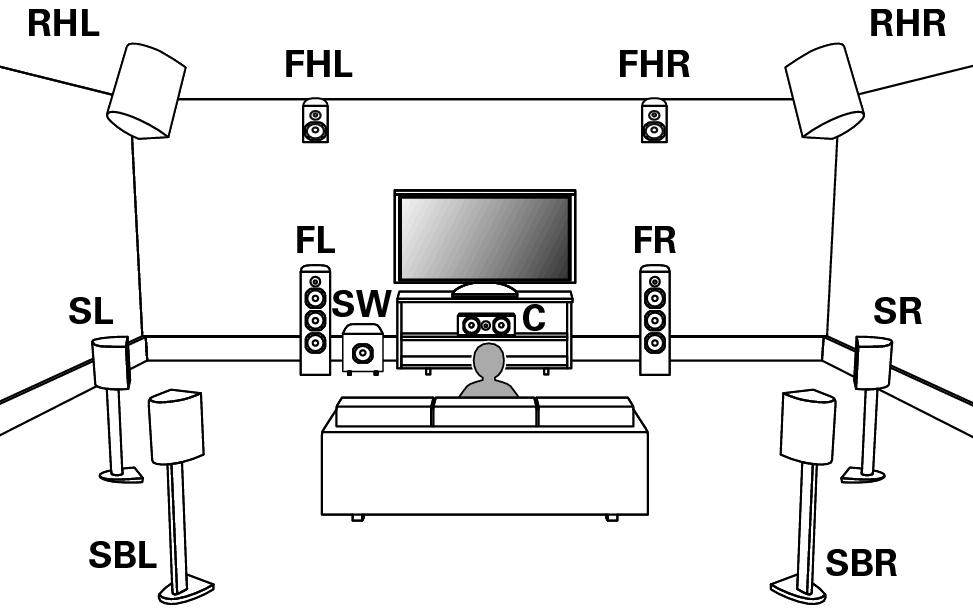
For each speaker connection, refer to Connecting a power amplink.
Set Speaker Layout in the menu as follows. link
Center: Yes
Surround: Yes
Surround Back: 2 spkrs
Height Speakers: 4 spkrs
Front Layout: Front Height
Rear Layout: Rear Height
Subwoofers: 1 spkr
The front height speakers and rear height speakers can be changed to other height, ceiling or Dolby Atmos Enabled speakers in the “Speaker Layout” - “Layout” settings.
Example layout when using front wide and two sets of height speakers
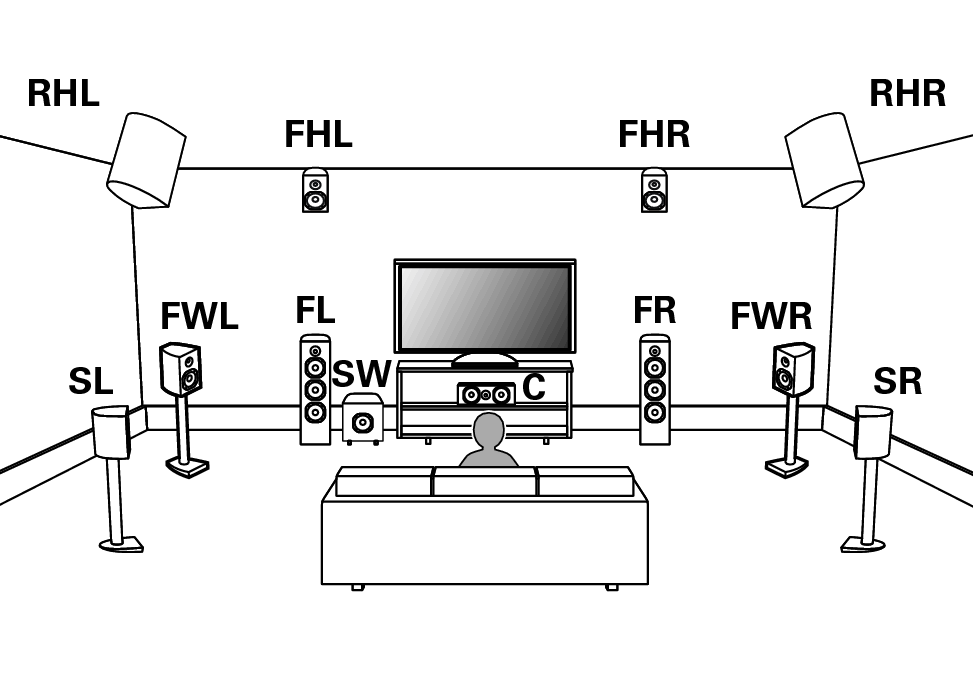
For each speaker connection, refer to Connecting a power amplink.
Set Speaker Layout in the menu as follows. link
Center: Yes
Surround: Yes
Front Wide: Yes
Height Speakers: 4 spkrs
Front Layout: Front Height
Rear Layout: Rear Height
Subwoofers: 1 spkr
The front height speakers and rear height speakers can be changed to other height, ceiling or Dolby Atmos Enabled speakers in the “Speaker Layout” - “Layout” settings.
Example layout when using three sets of height speakers
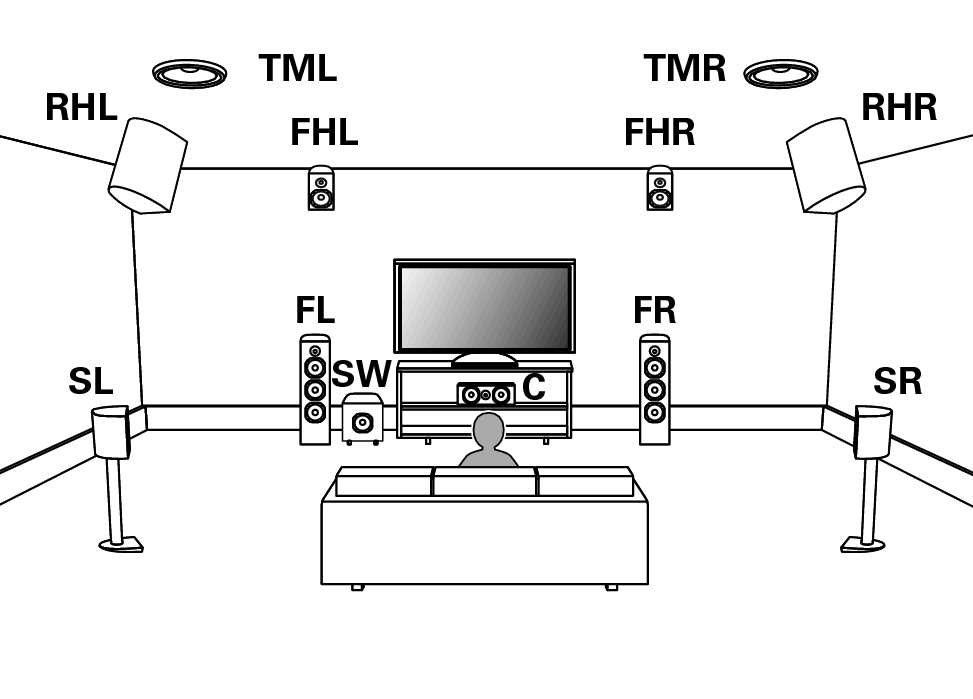
For each speaker connection, refer to Connecting a power amplink.
Set Speaker Layout in the menu as follows. link
Center: Yes
Surround: Yes
Height Speakers: 6 spkrs
Front Layout: Front Height
Middle Layout: Top Middle
Rear Layout: Rear Height
Subwoofers: 1 spkr
The front height speakers, top middle speakers and rear height speakers can be changed to other height, ceiling or Dolby Atmos Enabled speakers in the “Speaker Layout” - “Layout” settings.
Example layout for Auro-3D 11.1 channel system
This speaker configuration is optimized for Auro-3D playback.
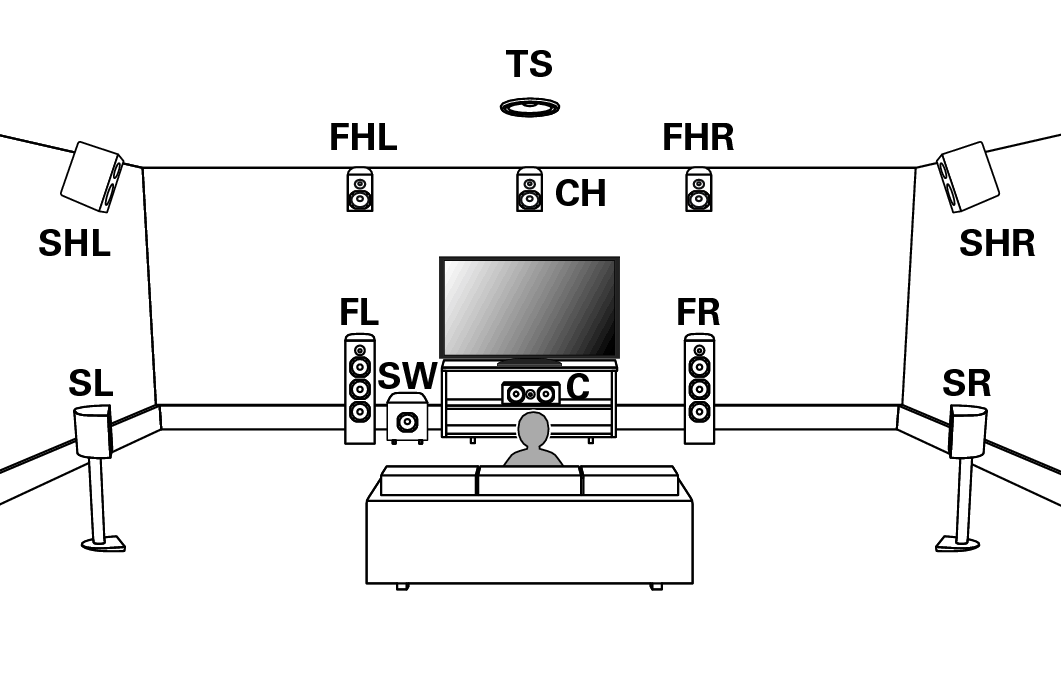
For each speaker connection, refer to Connecting a power amplink.
Set Speaker Layout in the menu as follows. link
Center: Yes
Surround: Yes
Height Speakers: 6 spkrs
Front Layout: Front Height
Middle Layout: Surround Height
Rear Layout: No
TS/CH: TS/CH
Subwoofers: 1 spkr
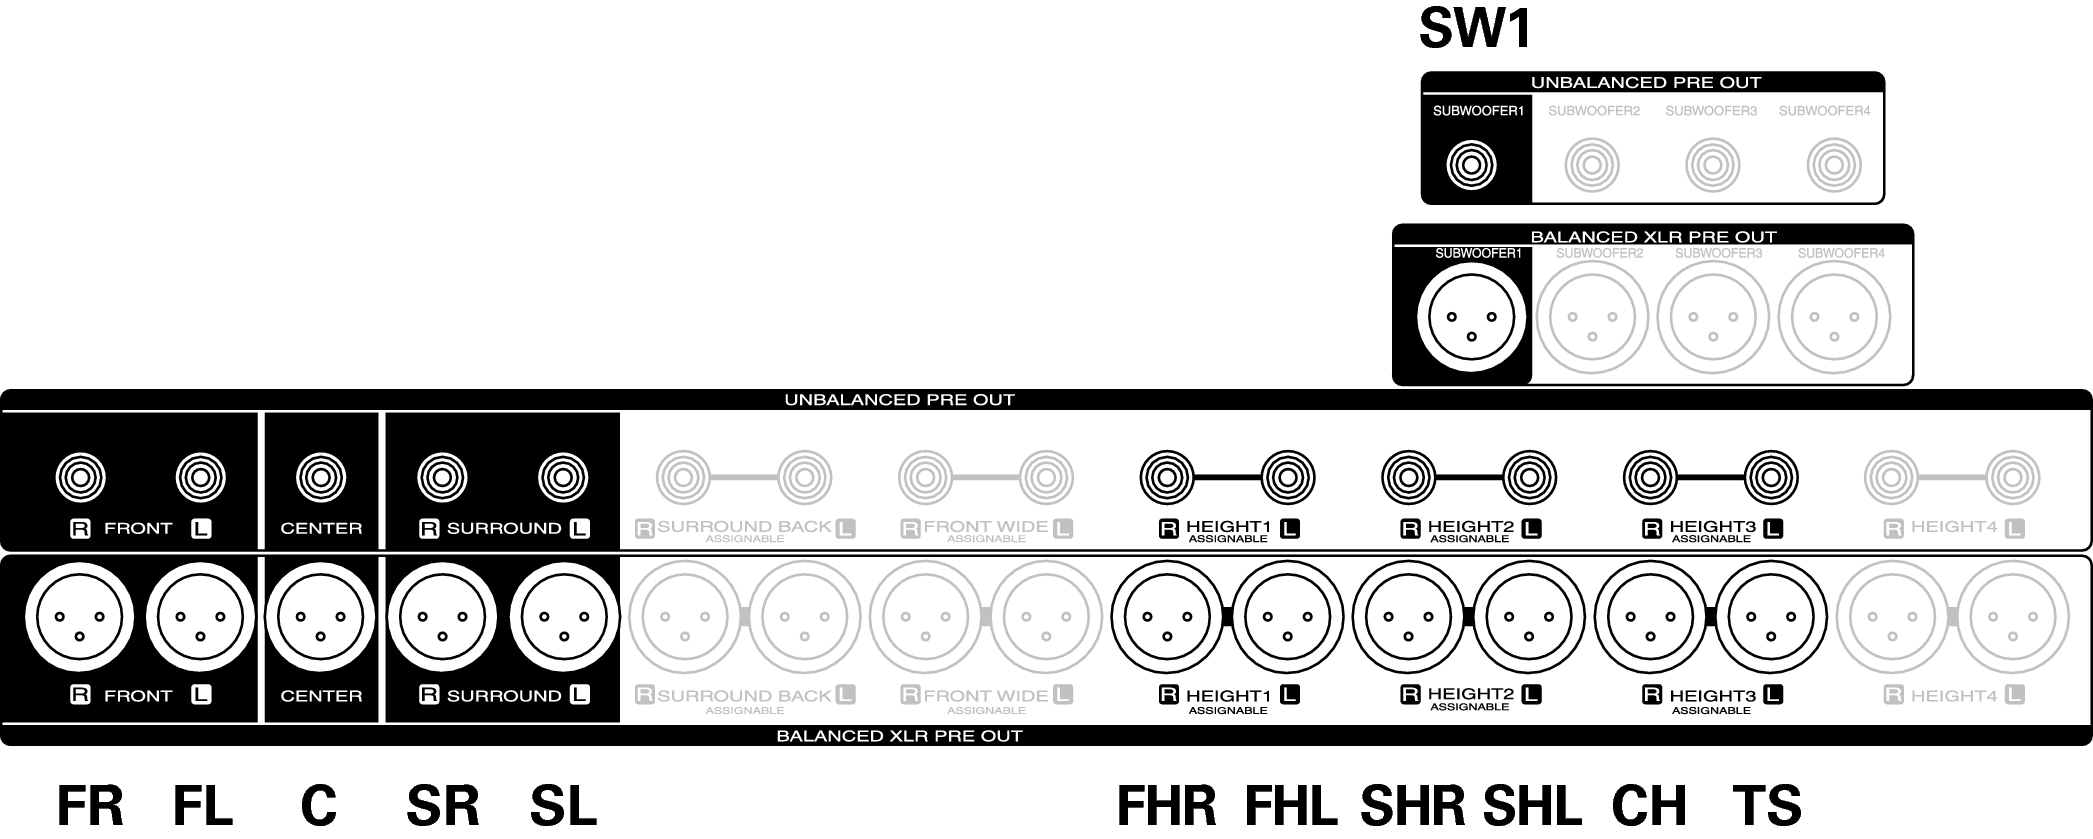
To use two sets of height speakers with a center height and top surround speakers, connect the center height and top surround speakers to the HEIGHT 3 connector.
For the best Auro-3D experience Surround Height speakers are recommended, however you may substitute Rear Height speakers from a Dolby Atmos speaker setup in place of Surround Height speakers.