Search result
Before connecting a power amp
Connect a power amp (sold separately) to the PRE OUT connector of this unit.
This unit has UNBALANCED RCA PRE OUT connector and BALANCED XLR PRE OUT connector. Connect to the correct connector for your power amp. If your power amp has both connectors, connect to either of them.
Connect the speakers to the power amp.
For details on speaker connections, see the Owner's Manual for the power amp.
This section shows how to make a 13.1-channel connection.
For how to make other speaker connections, see page link.
 AV8805BALANCED XLR PRE OUT connector PIN arrangement
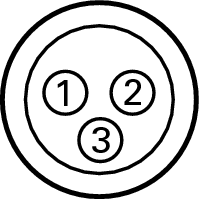
GND (Ground)
HOT (+)
COLD (–)
The PIN arrangement in this unit uses the European method.
In the USA method,  is COLD, and
  is HOT.
When connecting a device that utilizes the USA type of PIN arrangement, replace the and plugs on one side of the balanced cable.
NOTE
Do not short the HOT and GND or COLD and GND for use.
Disconnect this unit’s power plug from the power outlet before connecting the speakers.
Also, turn off the power amp and subwoofer.
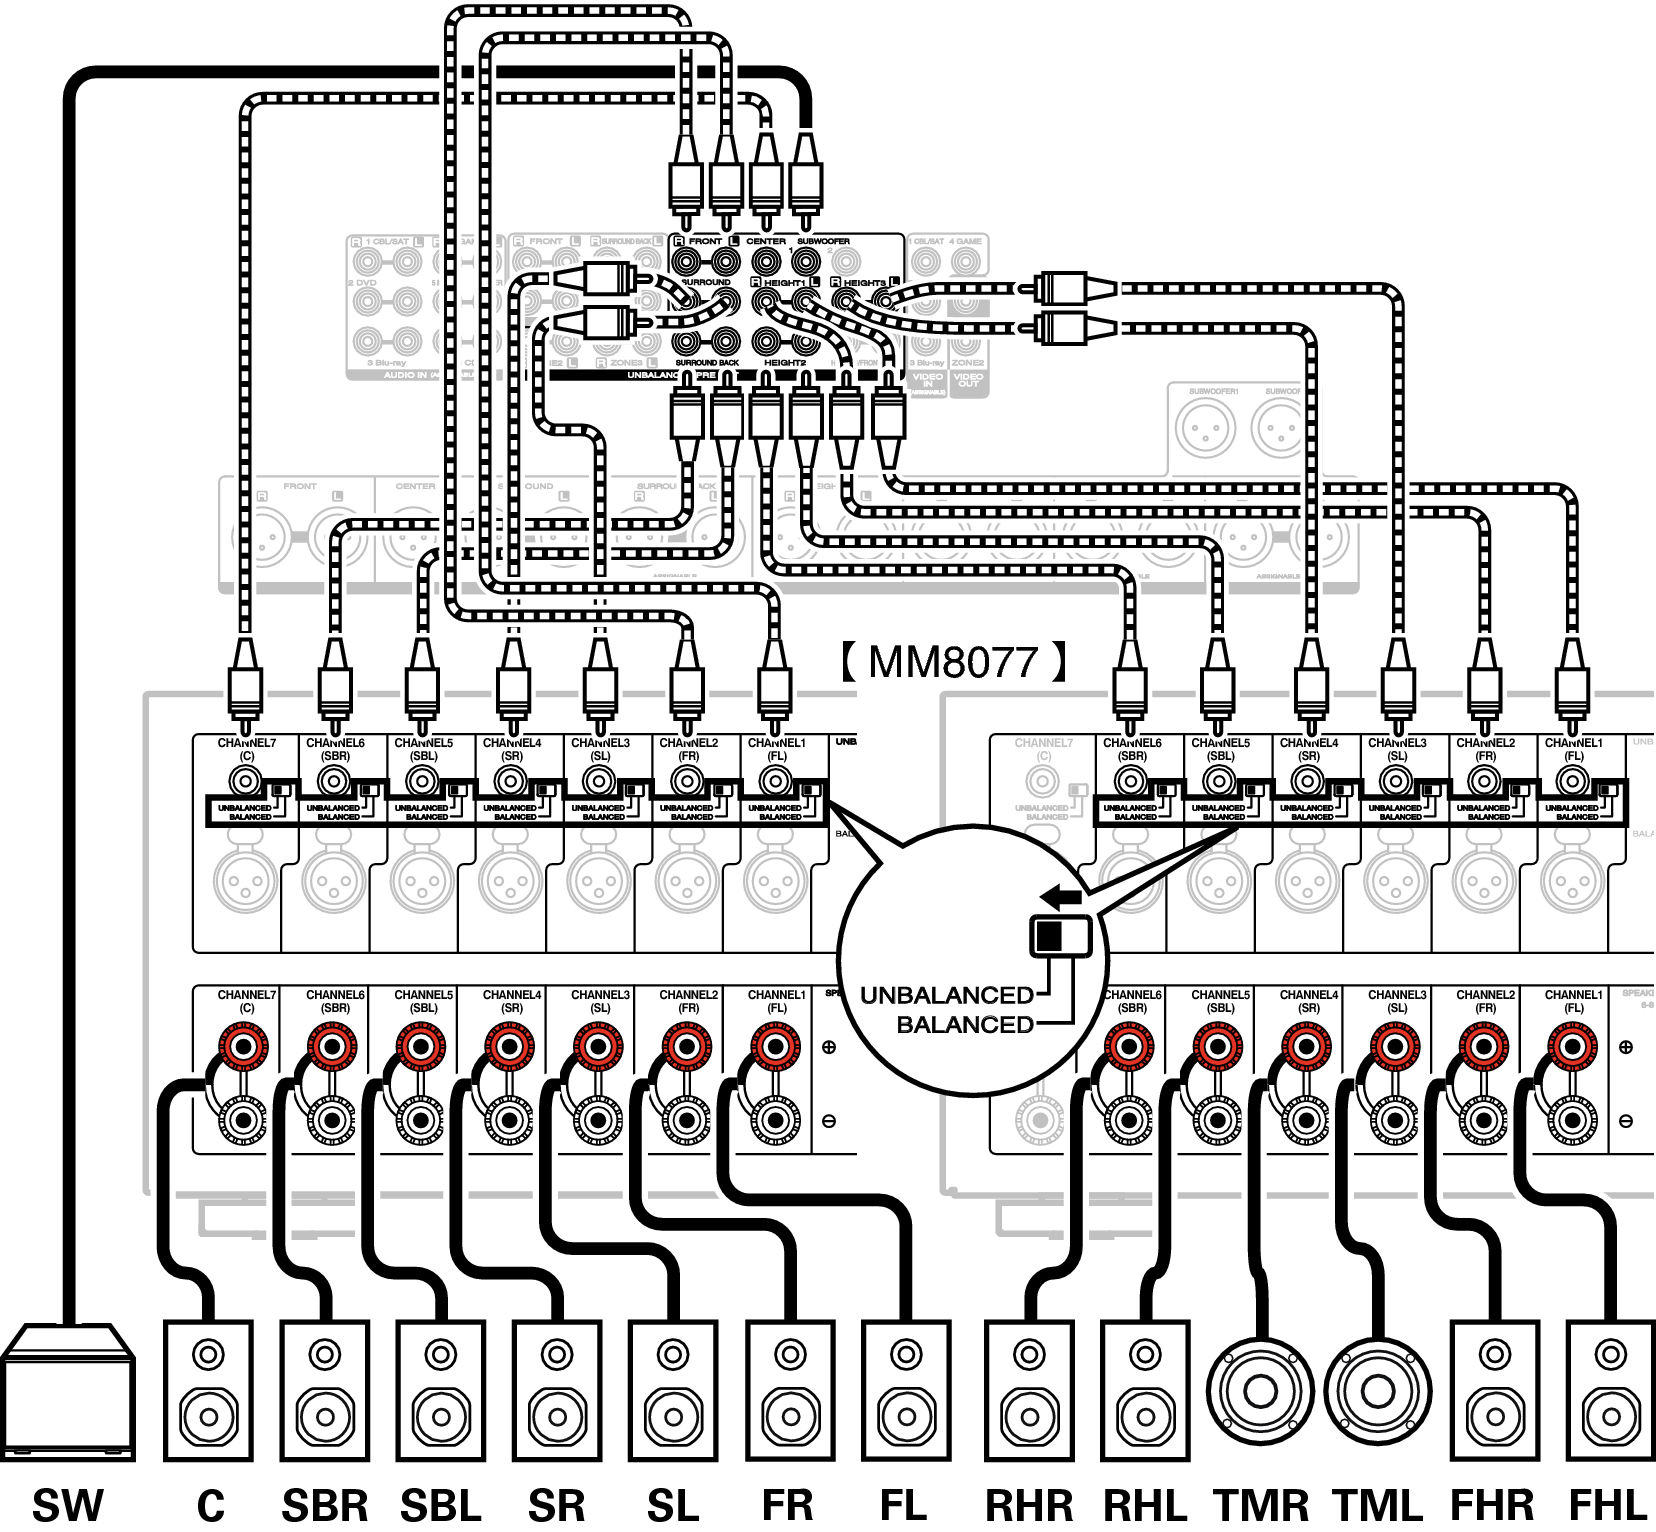
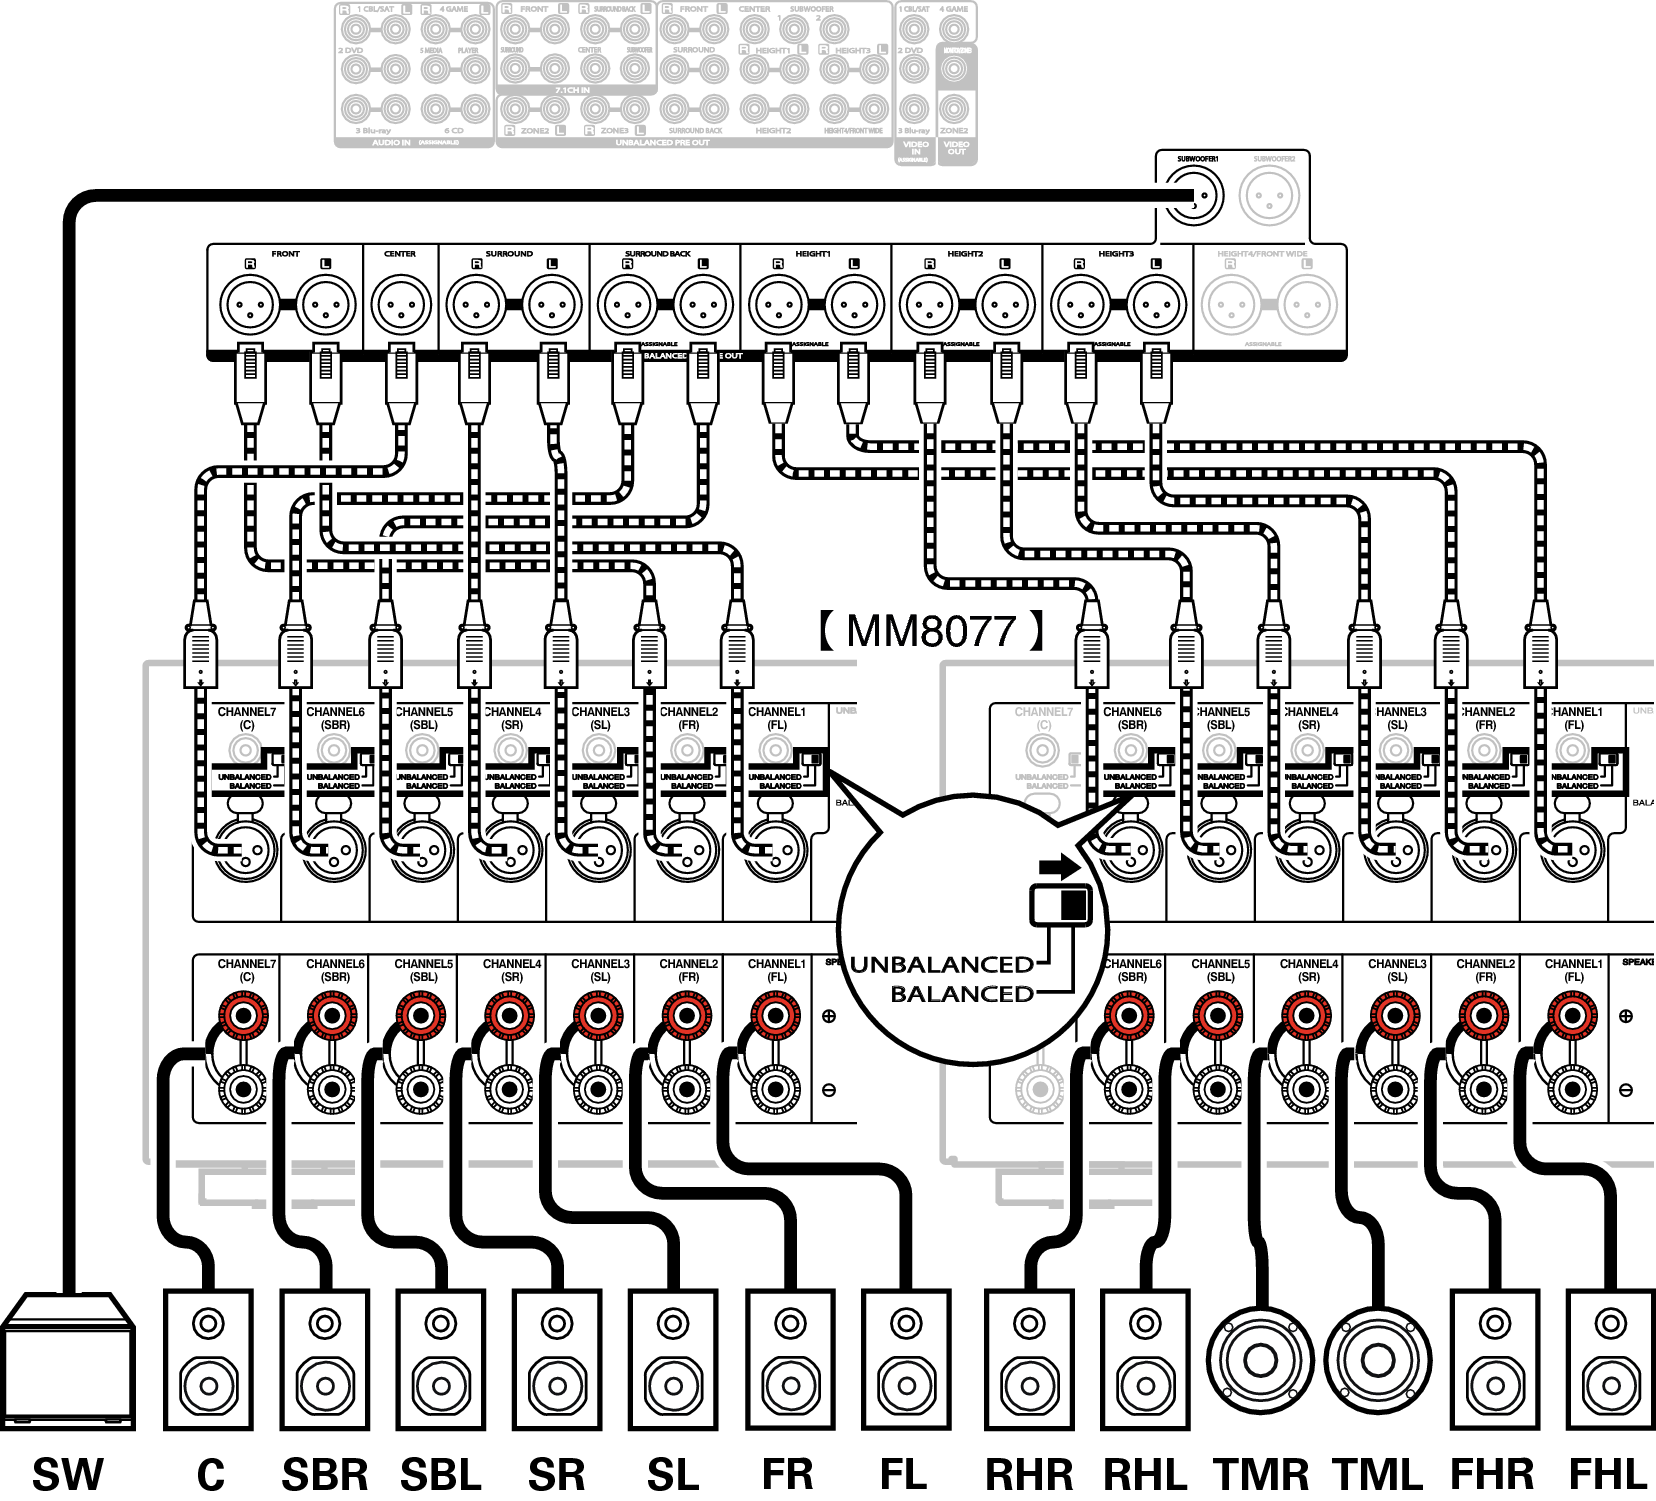
Example of connections to Marantz MM8077 and MM7025 power amps
Connecting the UNBALANCED RCA PRE OUT connector
When using UNBALANCED RCA connectors for connection, set the input change switch to “UNBALANCED” on MM8077.
Connecting the BALANCED XLR PRE OUT connector
When using BALANCED XLR connectors for connection, set the input change switch to “BALANCED” on MM8077.
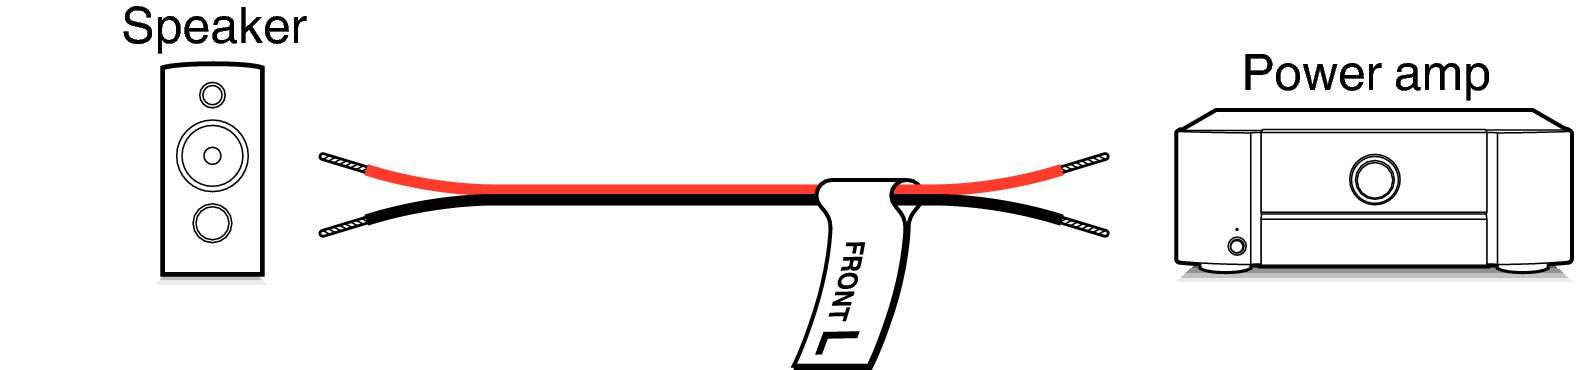
About the cable labels (supplied) for channel identification
Attach the cable label corresponding to each speaker to each speaker cable.
This makes it easier to connect the speakers to the power amp.
|
Channel |
Color |
|---|---|
|
FRONT L |
White |
|
FRONT R |
Red |
|
CENTER |
Green |
|
SURROUND L |
Light Blue |
|
SURROUND R |
Blue |
|
SURROUND BACK L |
Beige |
|
SURROUND BACK R |
Brown |
|
FRONT WIDE L |
Light Yellow |
|
FRONT WIDE R |
Yellow |
|
FRONT HEIGHT L |
Light Yellow |
|
FRONT HEIGHT R |
Yellow |
|
TOP FRONT L |
Light Yellow |
|
TOP FRONT R |
Yellow |
|
TOP MIDDLE L |
Light Yellow |
|
TOP MIDDLE R |
Yellow |
|
TOP REAR L |
Light Yellow |
|
TOP REAR R |
Yellow |
|
SURROUND HEIGHT L |
Light Yellow |
|
SURROUND HEIGHT R |
Yellow |
|
REAR HEIGHT L |
Light Yellow |
|
REAR HEIGHT R |
Yellow |
|
TOP SURROUND |
Light Yellow |
|
CENTER HEIGHT |
Yellow |
|
FRONT DOLBY L |
Light Yellow |
|
FRONT DOLBY R |
Yellow |
|
SURROUND DOLBY L |
Light Yellow |
|
SURROUND DOLBY R |
Yellow |
|
BACK DOLBY L |
Light Yellow |
|
BACK DOLBY R |
Yellow |
|
SUBWOOFER1 |
Black |
|
SUBWOOFER 2 |
Black |
Refer to the table and attach the label to each speaker cable.
How to attach the cable labels