Web control function
You can control this unit from a web control screen on a web browser.
This unit and the PC need to be connected to the network properly in order to use the web control function. link
Depending on the settings of your security-related software, you may not be able to access this unit from your PC. If this is the case, then change the settings of the security-related software.
Switch the “Network Control” setting to “On”. link
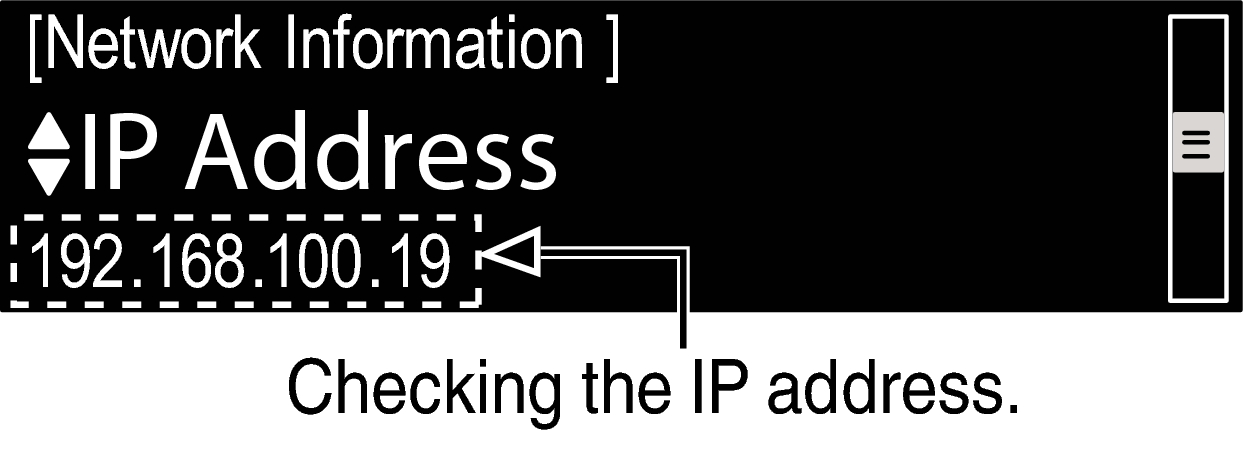
Check the IP address of this unit with “Network Information”.
Start up the web browser.
Enter the IP address of this unit in browser’s address box.
For example, if the IP address of this unit is “192.168.100.19”, enter “http://192.168.100.19/”.

Entering the IP address.
By adding this unit’s IP address to the browser’s bookmark, you can display the web control screen using the bookmark function the next time you use the browser. If you are using a DHCP server and “Network Control”link is set to “Off”, turning the power on/off changes the IP address.
If you are using the Safari web browser, you can select “Bonjour” and directly access the unit’s web control screen from the overview section.
When the top menu is displayed, click on the menu item you want to operate.
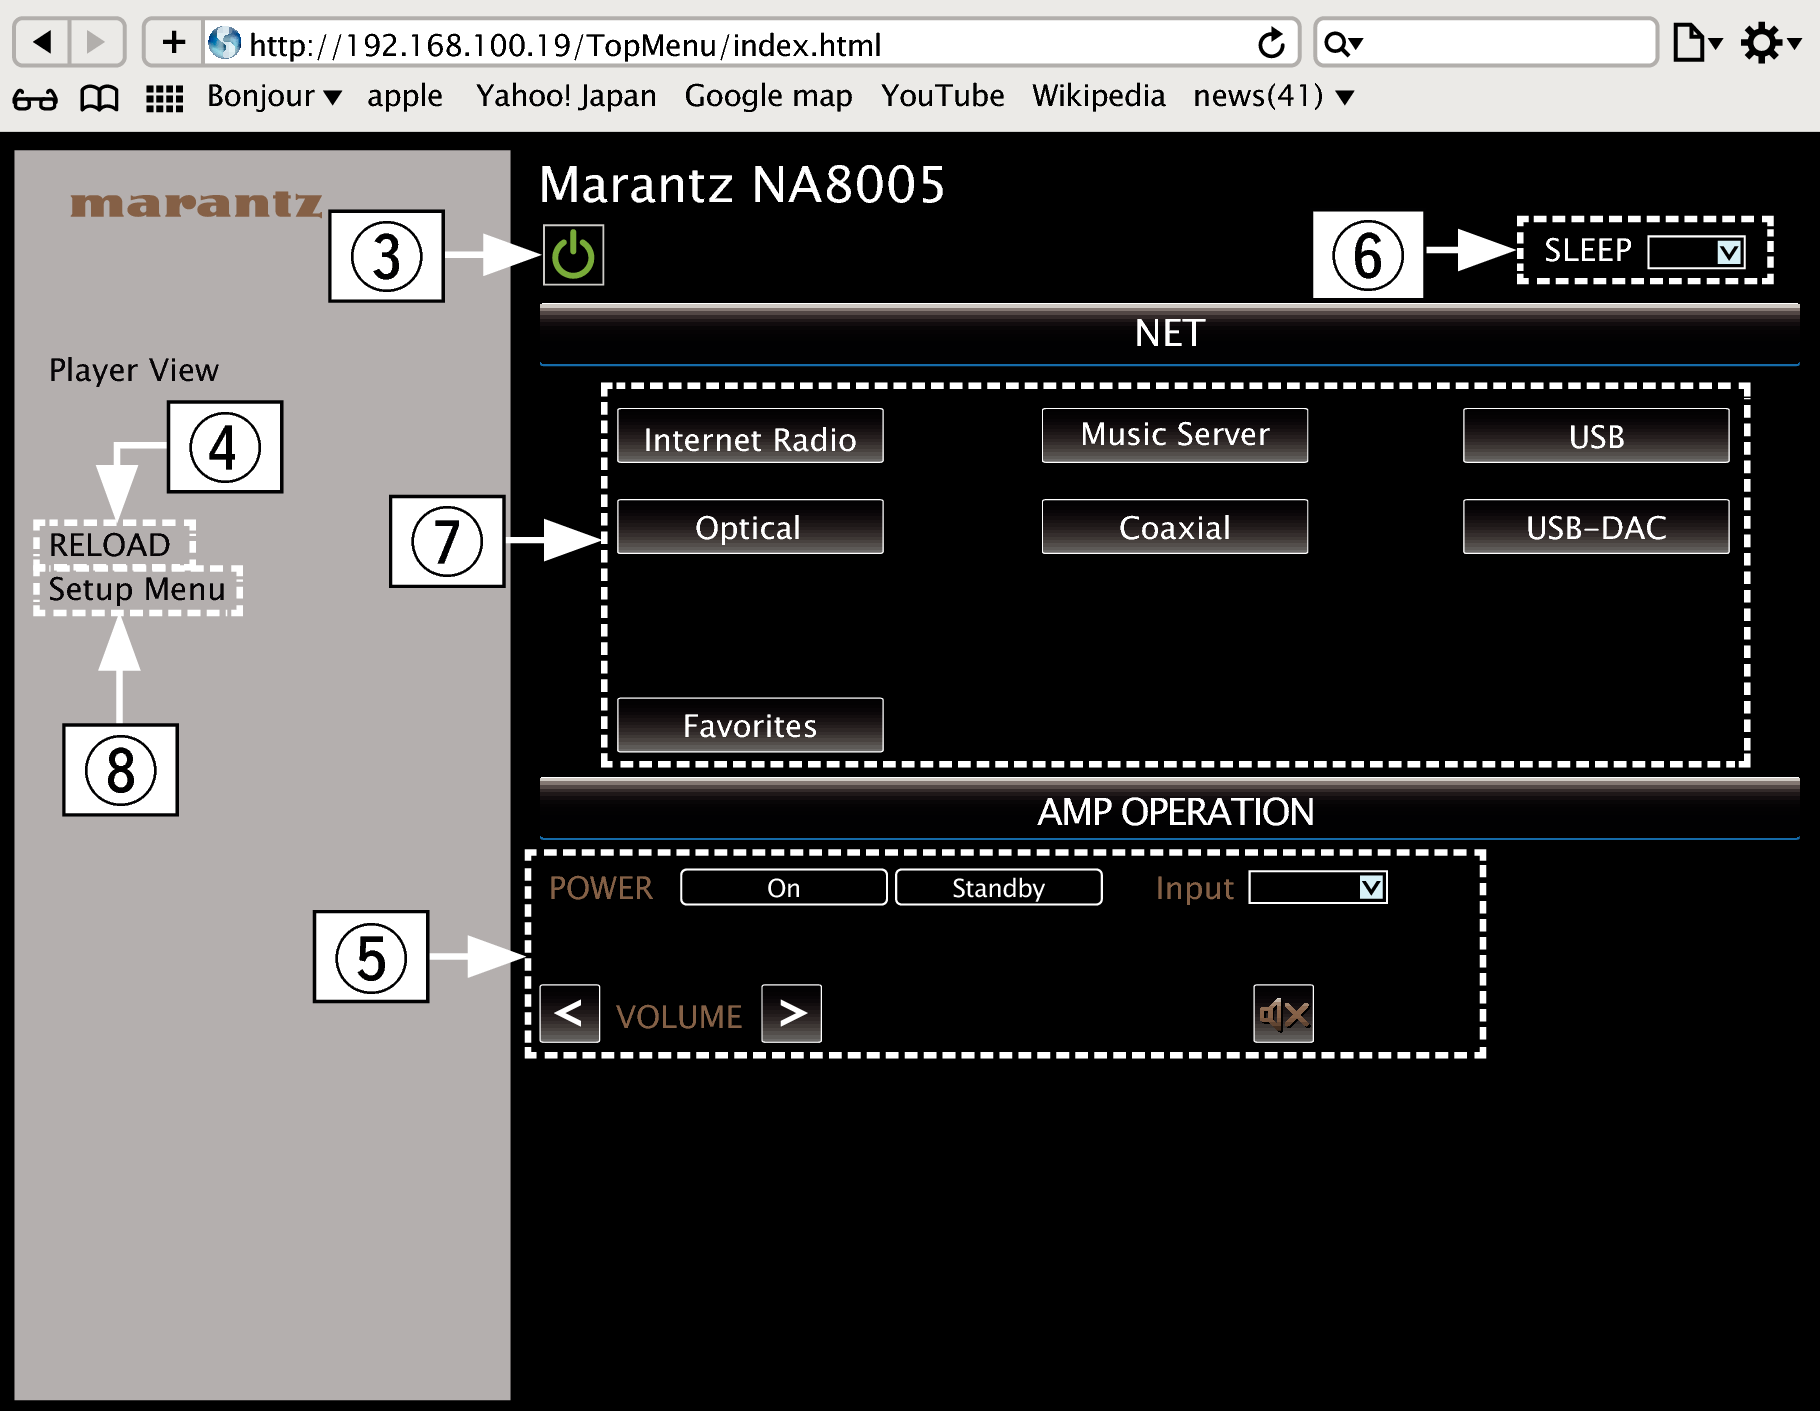
Click when you perform a power operation of the unit.
Click when you update to the latest information. Normally, there is a change to the latest information each time you operate. When operating from the main unit, click this or else the screen will not be updated.
Click to operate the Marantz amp connected by Remote connector cable. link
Click “v” to set the sleep timer function.
Click a button to change the input source.
Click when you operate the setup menu.
Operate.
 Network Setting
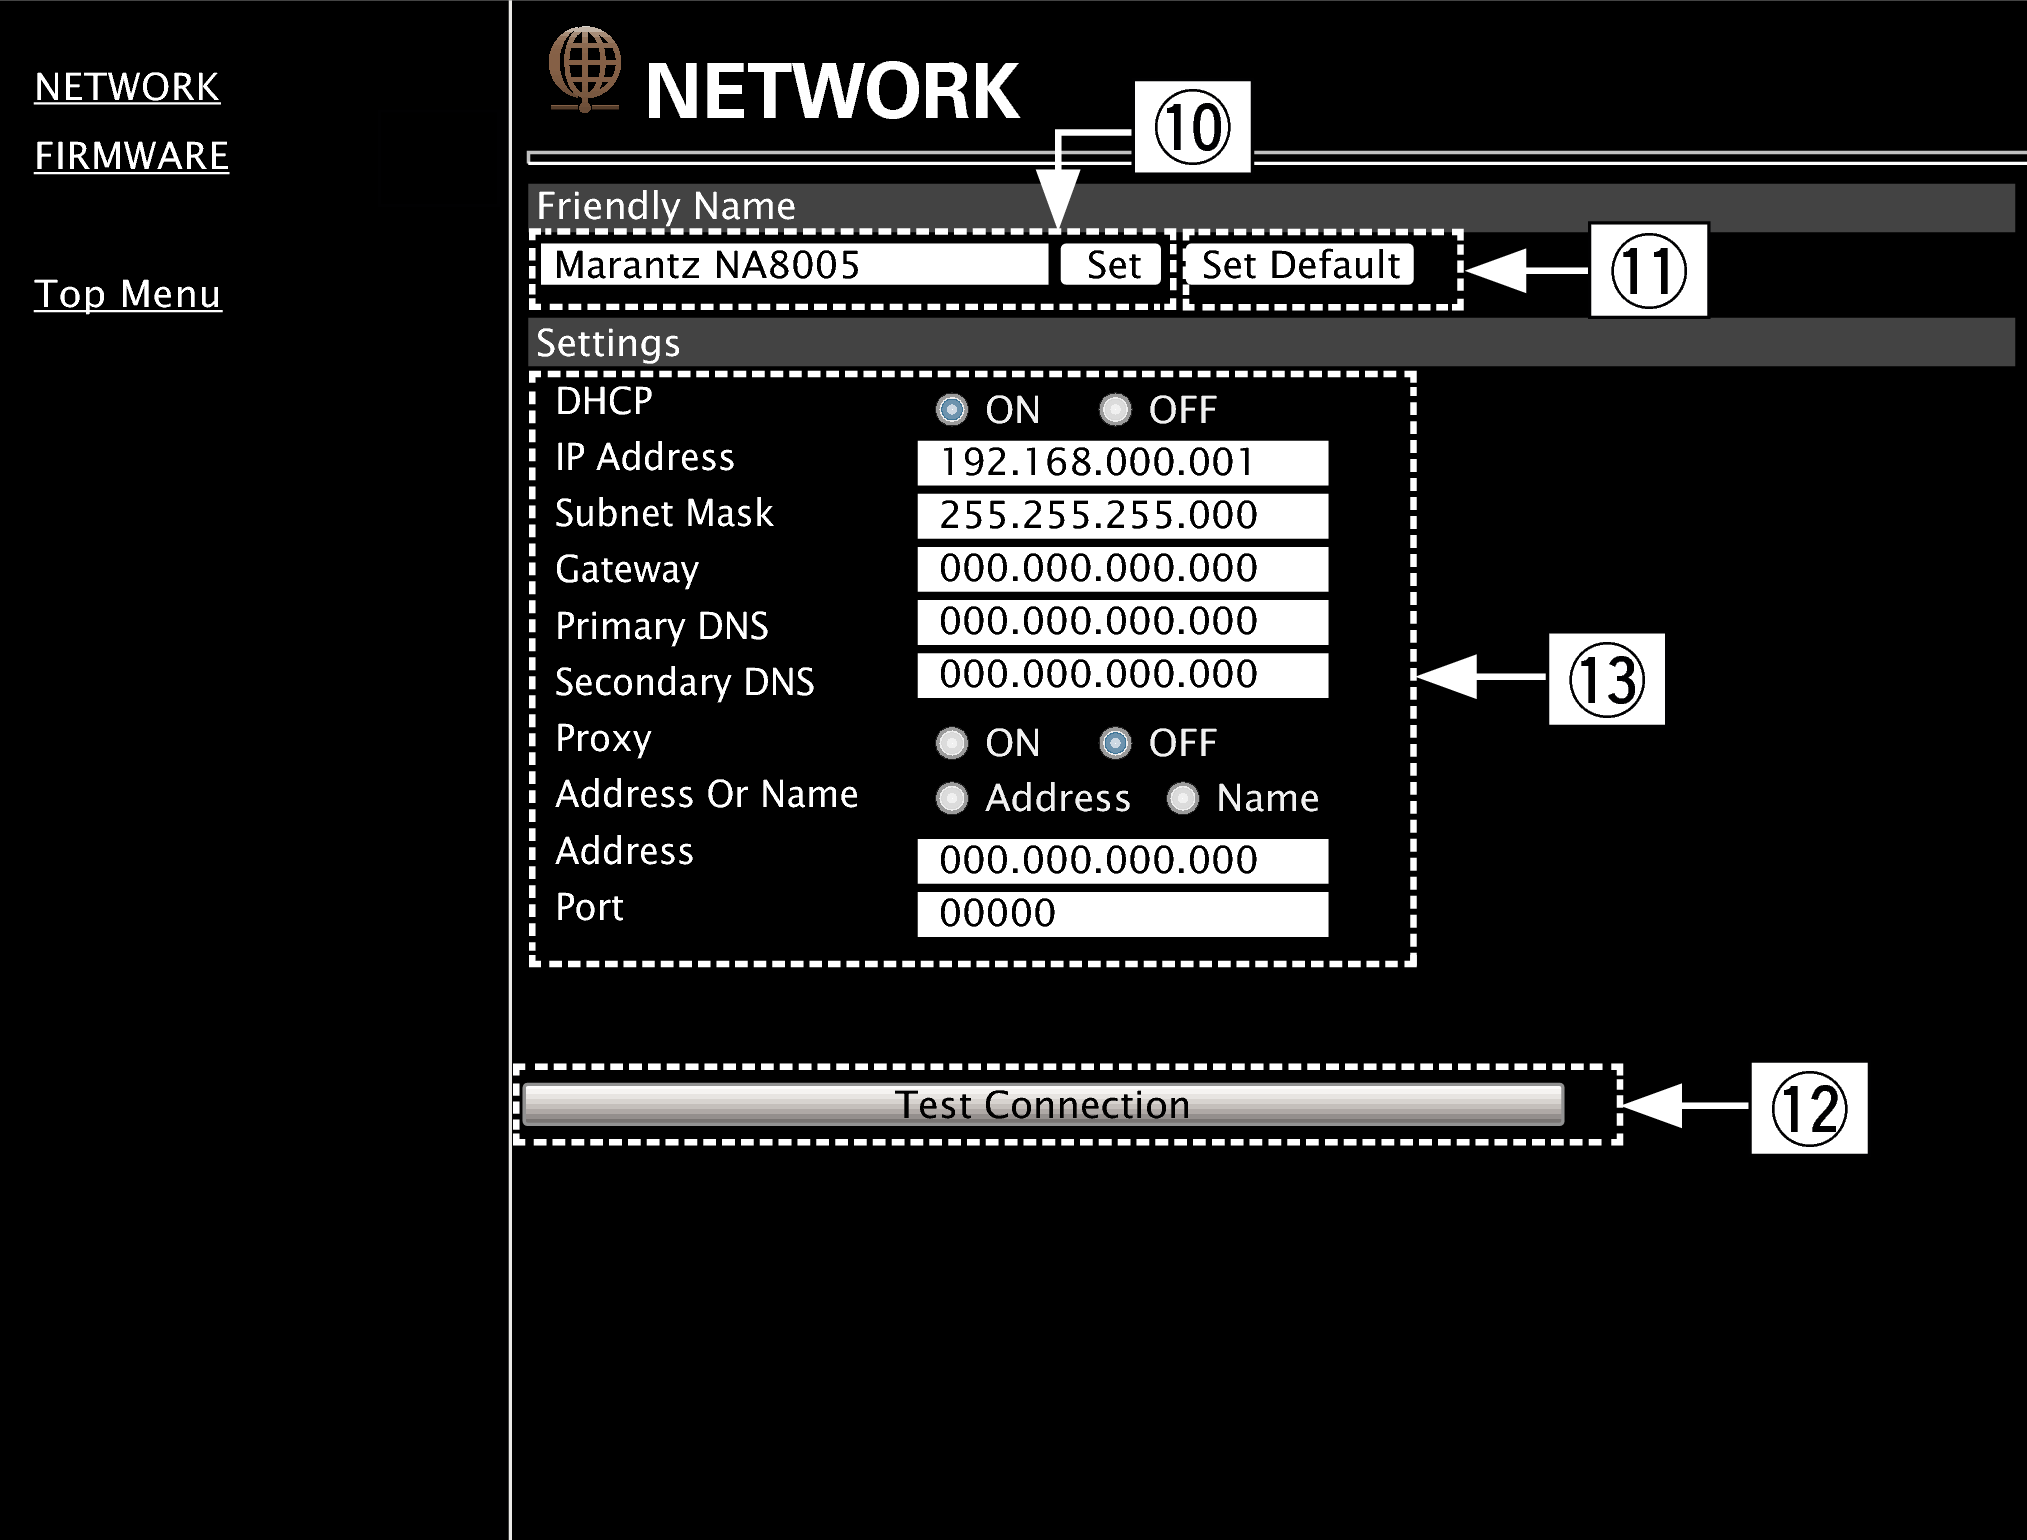
Friendly Name setting
To change the Friendly Name, enter the new name in the text box and click “Set”.
To reset the Friendly Name, click “Set Default”.
Network connection settings
Click to connect using the newly applied settings.
When changing DHCP/proxy settings, input or select for each item.
NOTE
Items displayed may vary depending on selected items and connection status.
After selecting each item, wait a moment for the display to be updated.
To apply network connection settings, click “Test Connection” after making changes.